Previously I have described how to set up a WireGuard VPN to access your home network. In many ways I prefer WireGuard to other VPN solutions due to its better performance and faster connection times but there are various reasons why it may not always be appropriate particularly in a corporate or heavily mult-user environment. Firstly, WireGuard requires all members of the VPN to have a static IP address, meaning that managing multiple users can become a maintenance headache, require a large IP space and require VPN connections to be centrally configured. Additionally, all authentication for WireGuard is based on the host key, meaning it’s not possible to configure per-user logins for controlling access, anyone with access to the PC can connect to the VPN. This may violate the security policies of various organisations. Finally, although the situation is improving, WireGuard only has full kernel level support in Linux and macOS. Currently a functional client for Windows does exist but it is pre-alpha meaning not all features are present and stability cannot be guaranteed. OpenVPN solves these problems as it is an older VPN protocol with good cross-platform support and full support for DHCP and per-user logins. It also provides the option of using client certificates for device authentication instead of or in addition to user logins. This will be beneficial for those who like WireGuard’s approach of having device authentication, meaning that as well as knowing a username and password, a user would need to connect in from an authenticated device, reducing the risk of remote compromise. Other authentication protocols such as RADIUS and LDAP are supported if you want to add multi-factor authentication or synchronise user accounts with your organisation’s central user directory such as Microsoft Active Directory or RedHat IDM or FreeIPA. However, this is outside the scope of this article.
Should I use client certificates?
For the best security you should use client certificates. The main drawback, particularly for enterprise deployments is distributing the certificates as they have to be generated on the firewall and then passed to the client device. As the certificates are owned by the user, not by the device, it is not enough to configure the VPN on a device and then allow any user to log in with their credentials to access the VPN, the certificate will need to be added for each user account wishing to access the VPN from a given device. pfSense has tools to make this deployment a bit easier but the level of administrative overhead will still be the main consideration in deciding whether to use client certificates. For this guide I will describe the steps required to set up OpenVPN with client certificates but will mention when a step needs to be modified or omitted if you choose not to use them.
Configure OpenVPN Server
Create a Certificate Authority
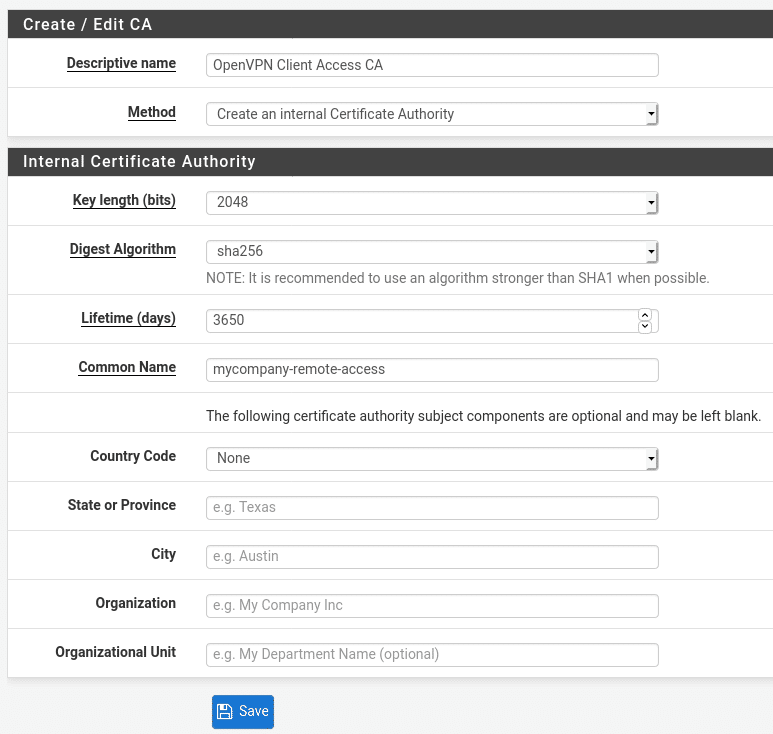
As OpenVPN is based around OpenSSL, it requires at least the server to have a certificate. If you are planning to use client certificates you will need a CA to issue them. From the pfSense dashboard, go to System > Cert. Manager > CAs and click Add to create a new CA. Enter a descriptive name to help you identify what the CA is called and a common name which will appear on the certificates. The rest of the settings can be adjusted if required but the defaults should provide a reasonable balance between security and performance for most use cases. By default the CA lifetime is set to 3650 days (10 years) which is reasonable for a CA but can be adjusted if desired. If you wish you can also include location and organisation data but this is entirely optional.
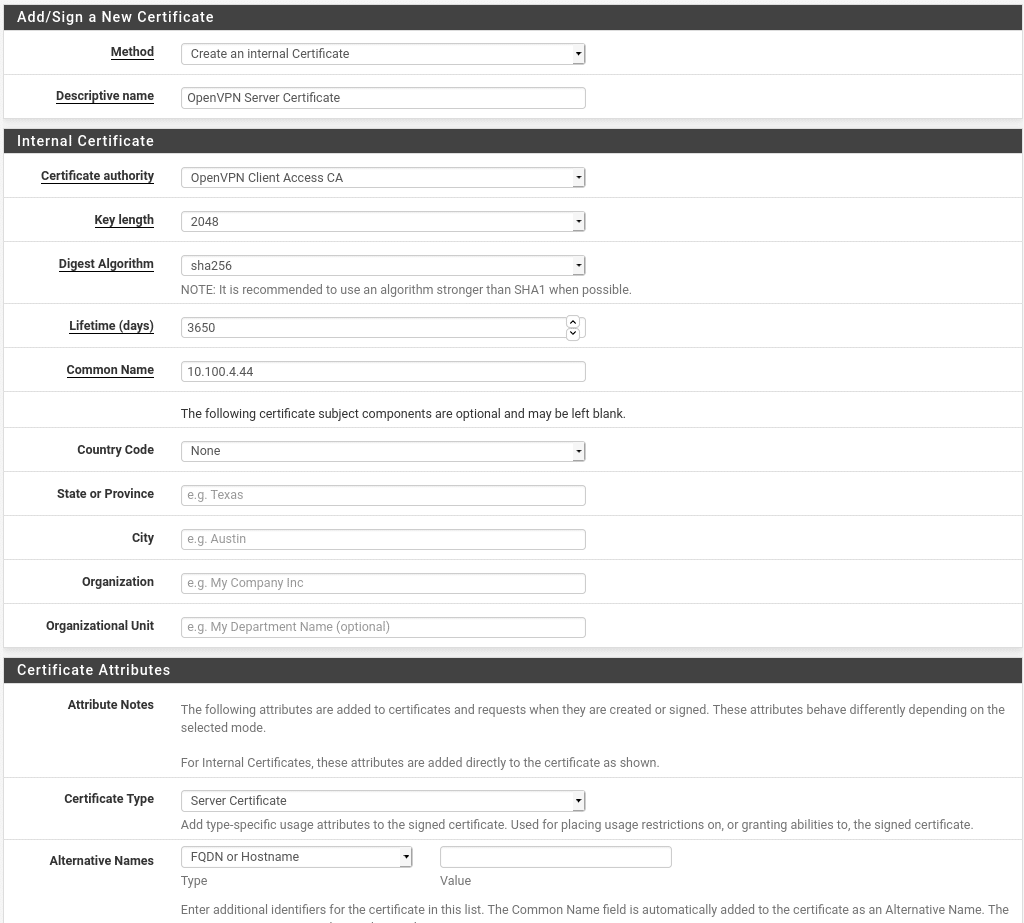
Once you save, you should see your OpenVPN Client Access CA in your list of Certificate Authorities, you can now use this CA to sign the certificate we will use for our OpenVPN server. From the Cert. Manager screen, go to Certificates and click Add/Sign. You will now need to provide a descriptive name for your certificate, provide a common name for the certificate and change the Certificate Type to Server Certificate. All other values are optional. The common name should be the public (WAN) IP address of your firewall or, if you have a DNS record pointing at that IP, you can use that as well. This name must match up with the host identifier that clients will use to connect in otherwise you will get warnings about certificate errors. If you would like the certificate to work for multiple domain names or for either the domain name or IP address, you can add other Alternative names at the bottom of the page. If the user accesses the VPN via any of the specified names they will be treated as equivalent to using the common name.
Install Client Export package
pfSense provides a package called openvpn-client-export which creates preconfigured OpenVPN profiles for you to download containing all the VPN settings and the user certificate if one is used. For Windows users it also allows you to download an OpenVPN client installer which will automatically install the OpenVPN client application and configure it with the VPN settings. This step is optional as you could configure the client settings manually but in most cases, doing it will simplify deployment.
From the pfSense dashboard go to System > Package Manager > Available Packages and search for the openvpn-client-export package. Click the Install button to install it.
Configure the VPN server
Go to VPN > OpenVPN > Servers and click Add. On this page we will set all the settings for the server side of the OpenVPN connection. The page is broken down in to several sections and the following subheadings describe the options in each section.
General Information
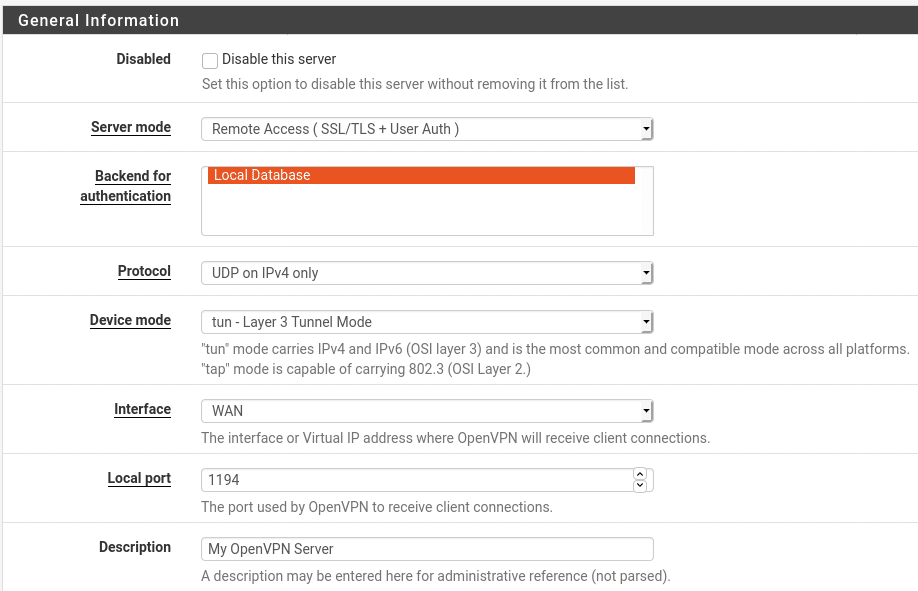
The only required change in this section is to change the Server Mode to one of the Remote Access options. I will use Remote Access SSL/TLS + User Auth but if you do not plan to use client certificates you can just stick with User Auth. The settings on this page will be the same whichever option you choose. The other setting you may wish to change is the listening port. By default OpenVPN listens on port 1194 in either UDP or TCP mode. You can change the port if you wish, either based on personal preference or if you are on a network which blocks VPN traffic or outbound ports. In these cases you may wish to use a port which is almost never blocked such as 53/UDP (DNS), 123/UDP (NTP) or 443/TCP (HTTPS) as these ports are almost never blocked. That said, you should use UDP if you can due to an issue called TCP Meltdown which can occur when tunnelling a TCP connection over another TCP connection. The issue occurs when one TCP connection detects an issue in the connection and compensates either by resending a packet or re-routing. As this then introduces an unexpected delay in the traffic it can then cause the other TCP connection to detect an issue and also attempt to retransmit packets which is then detected as a fault by the underlying connection and so on. This significantly reduces the performance of the tunnel and should be used as a last resort in situations where no UDP ports can be used. Finally, you should set a descriptive name so you can identify the VPN tunnel later. This is particularly useful if you have multiple tunnels configured.
Cryptographic Settings
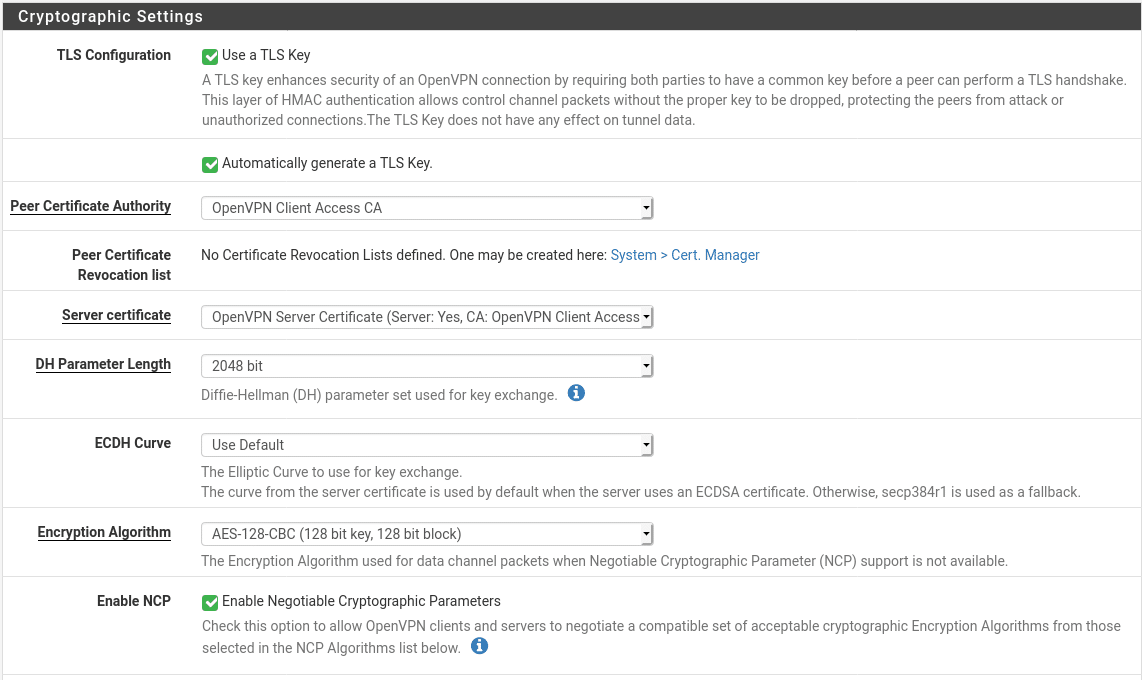
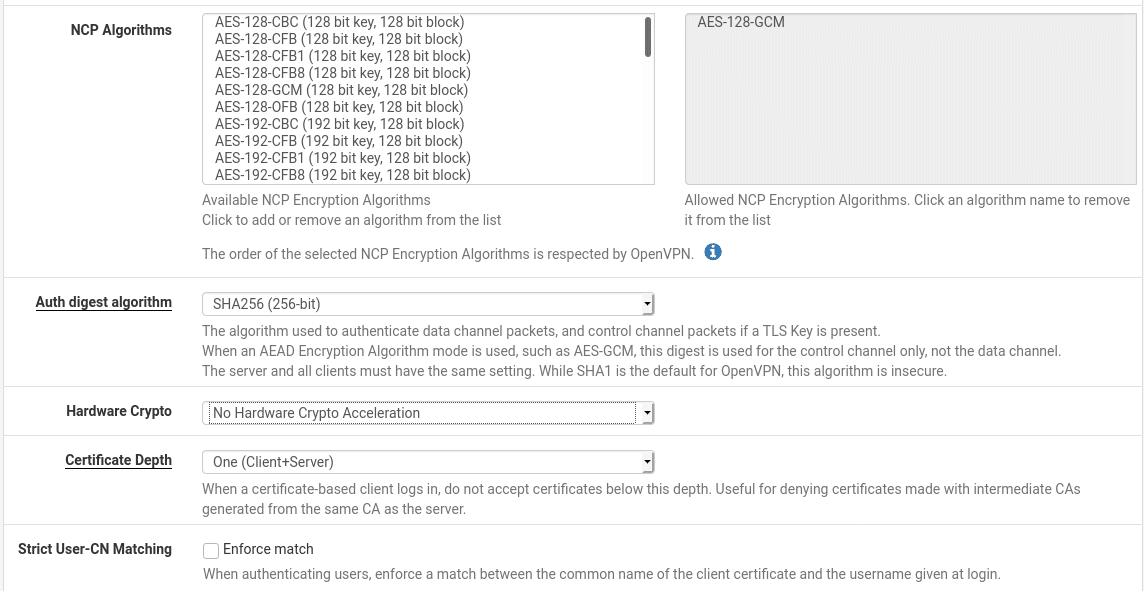
Most of these settings can be left as default for a typical setup. The only one which needs to be changed is the Server Certificate. Use the one we configured previously. Additionally you may wish to not use a TLS key. The TLS key is a shared key used to authenticate control packets, meaning unauthenticated packets can be immediately dropped. If you are using the client export package you have no reason to disable this but if you want to configure the clients manually this may become an additional administrative complication that you might not want. Finally, if your hardware supports it, enable hardware crypto acceleration to speed up the VPN and reduce load on your CPU
Tunnel Settings
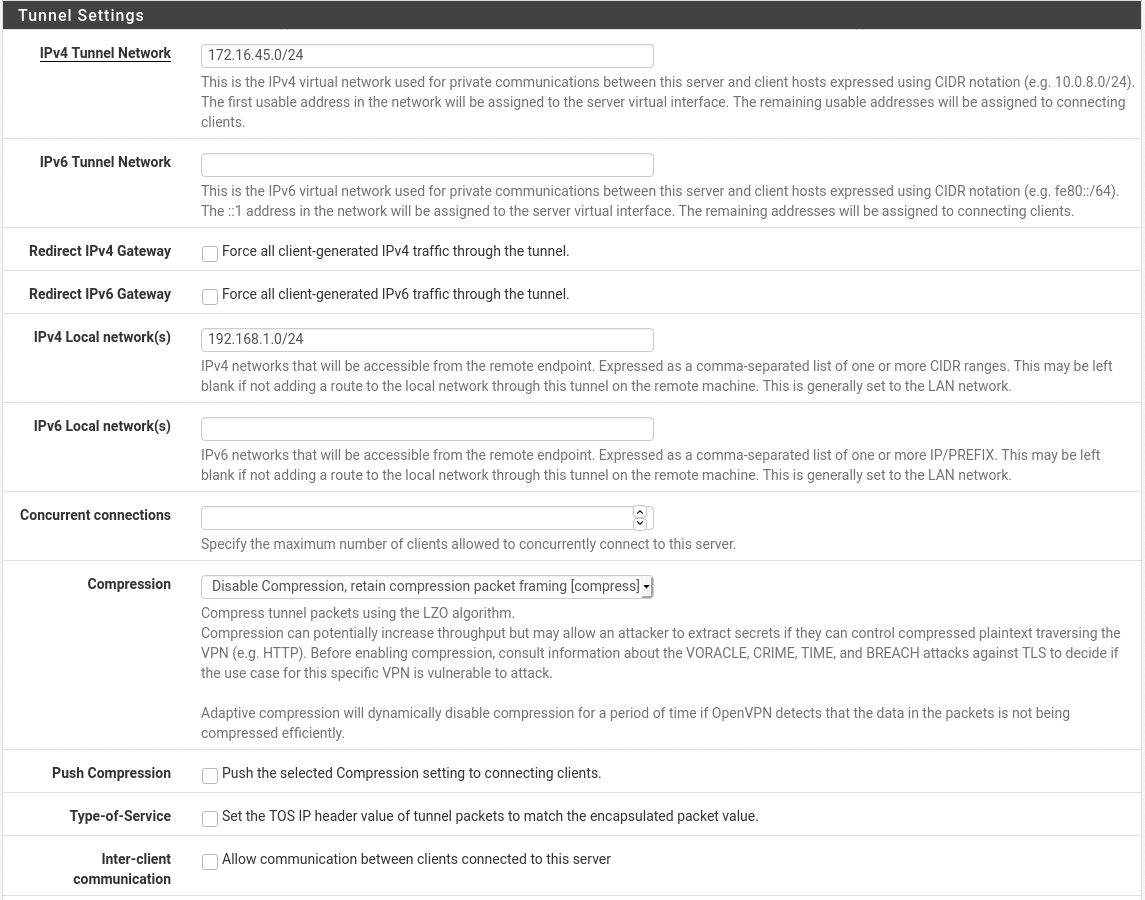
Here we define the network configuration for the traffic inside the tunnel. Our only required settings are the IPv4 Tunnel network and IPv4 Local Network(s). The IPv6 tunnel network and IPv6 Local Network(s) are also required if we want to send IPv6 traffic across the tunnel but these are not covered here. The tunnel network is the network that the members of the tunnel will use. The first usable address in the range will be used by the server and any other addresses will be available to be handed out to clients. The tunnel network will need to be in a private address range and it must be a range that is not used by other networks that the firewall has access to as this would cause routing conflicts. It is also advisable to not use a common range such as 192.168.0.0 as this is likely to cause conflicts on the client side if you are connecting in from networks which may use this range. We will use the range 172.16.45.0/24 in this example.
The IPv4 Local Networks are networks that pfSense has access to which you would like to make available to devices on the VPN. In most cases this will be your LAN but if you have multiple interfaces configured on your pfSense you may want to expose some or all of these over the VPN tunnel. You can use commas to separate multiple local networks.
You may also want to optionally use the gateway redirection settings to force all traffic to go through the VPN, not just the traffic destined for your LAN. This may be useful when you are using untrusted public WiFi to ensure all your traffic goes through your home or office internet connection.
Client settings
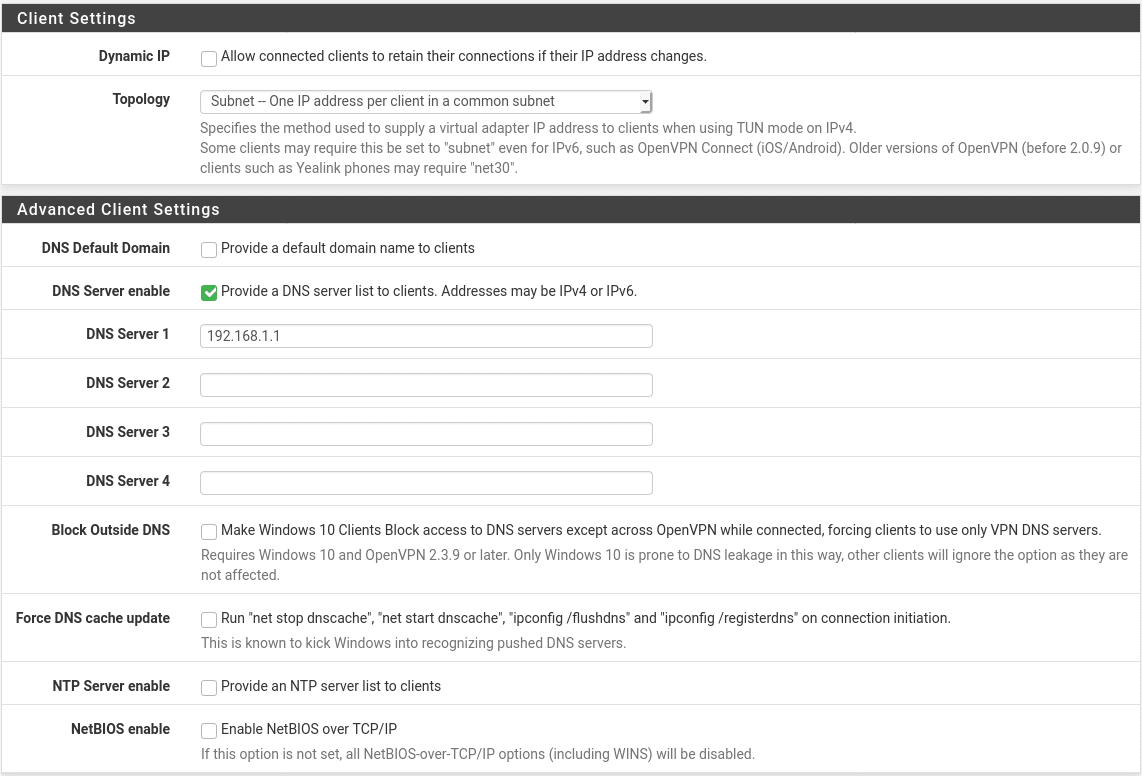
Most client settings can be left at their default values for most configurations. If you are running your own DNS internally, whether on pfSense itself or on another DNS server on your network, you will probably want to push this DNS server to your clients so they can access internal resources using domain names instead of IP addresses. For Windows networks you may also want to enable the settings to block DNS leakage, force update the DNS cache and enable NetBIOS over the VPN if it is required.
Once all settings are entered, hit Save and you should see your new VPN server in the list of available OpenVPN servers.

Add firewall rules
To finalise the server setup we need to create two firewall rules. Firstly, we need to allow traffic on port 1194/UDP to access the WAN interface of the firewall, then we need to allow traffic connecting over the VPN to access our LAN network.
Go to Firewall > Rules > WAN and add a rule with the following settings:

If you elected not to run your VPN server on port 1194 you will need to set the port range to “other” and manually enter the port number unless you are using another well known port such as DNS (53) in which case you can just select that option.
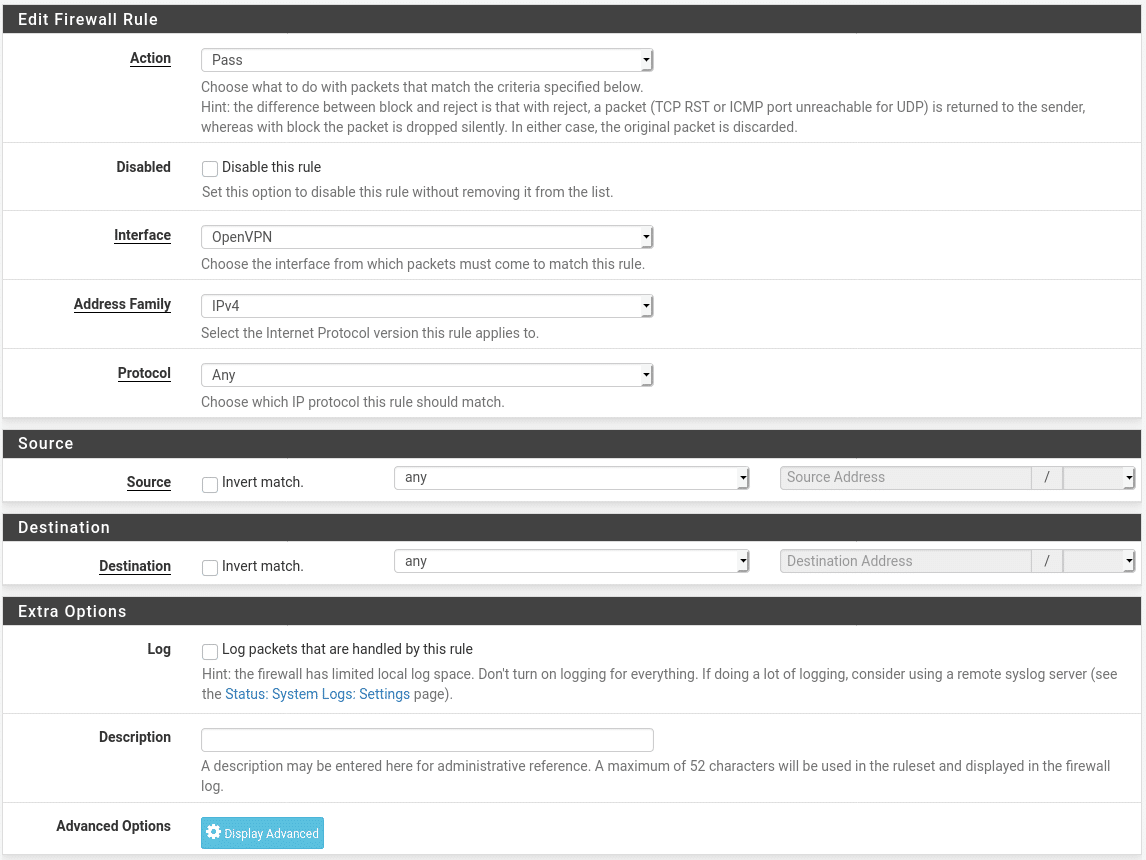
Next, go to the OpenVPN tab and create a rule. For the purposes of this exercise we will allow all traffic passing through the VPN to be forwarded but if you wanted to selectively allow traffic (e.g. can access web services on server2, files on server5 and DNS on server10 but can’t access anything else) you can of course create a more restrictive rule set here.
Adding a user
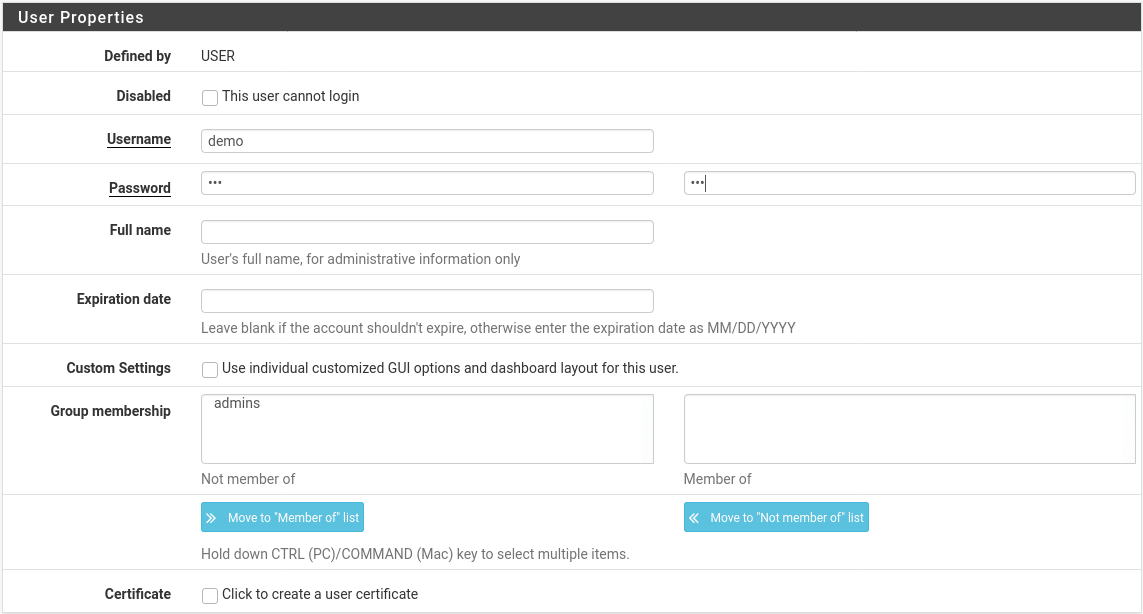
Our OpenVPN server is now fully set up but at present cannot be used as no users have been granted access to it. To do this we will need to create a user. Go to System > User Manager and add a user. You will need to configure a username and password as per the picture below. The other settings can be left as default although if you are only planning to grant the user temporary access you may want to set the account to expire automatically when access is due to be revoked.
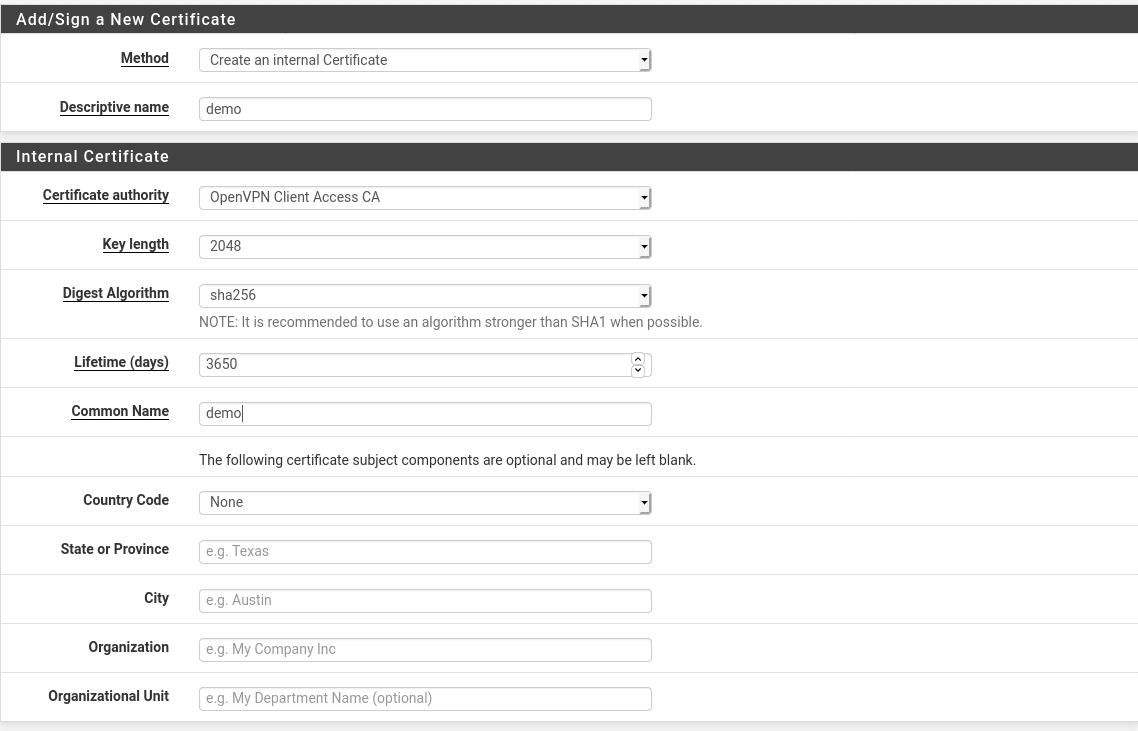
Once the user is created, if you are using user certificates to authenticate you will need to create a certificate for the user. In the user list, select pen icon next to the user you have created to edit it. Scroll down to the User Certificates section and click “Add”. Set the Common Name to match the username and leave all other settings as default. Repeat these steps for any other users you need to add.
Configure Client Settings
The easiest way to configure client settings is to use the openvpn-client-export package we installed earlier. Go to VPN > OpenVPN > Client Export. At the bottom of this there is a section called OpenVPN Clients. In this section you will see a list of available users whose configuration we can export.
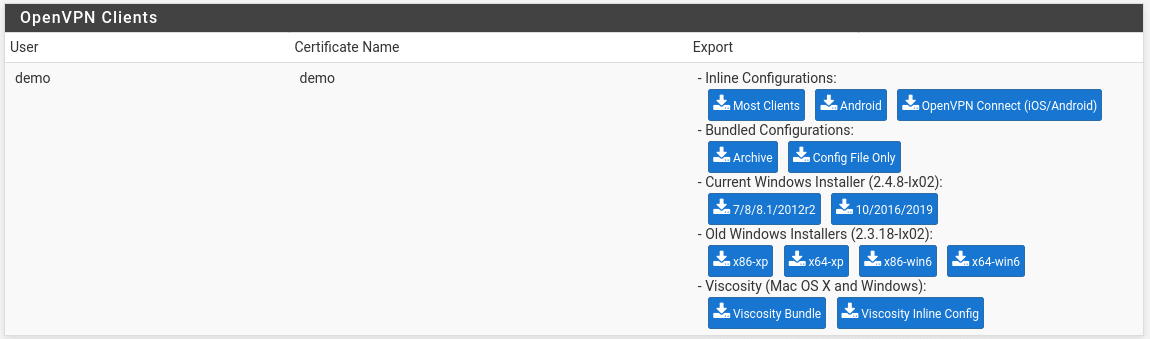
In the Export column we see various options for configuration export. For most devices, the inline configurations will be used. These are text files containing the server settings, certificates and private keys which will be needed to configure the VPN. These can be loaded in to an OpenVPN client and will appear as an available connection. For Windows PCs which do not have OpenVPN already installed, you can use the Windows Installer options to download an executable installer which will install the OpenVPN software and preconfigure it for use by that user.
Windows setup
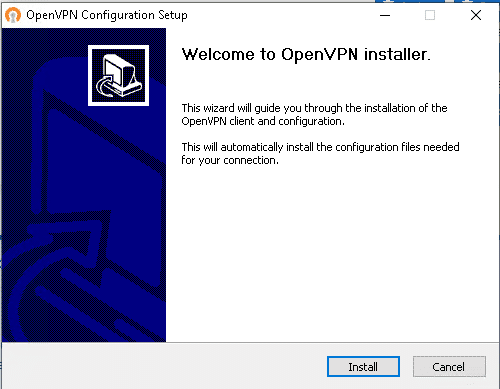
For Windows 7, 8 or 10 and their corresponding server versions you will want to use the 2.4.8 branch of OpenVPN client. For Windows XP or Vista (shown as win6 in this interface) you will need the older 2.3.18 branch (also, upgrade your PC). Download the installer you want and transfer it to the target PC. Download the correct installer and copy it to your target PC. The installer behaves like any standard Windows installer, just run it, click the “install” button and follow the prompts.
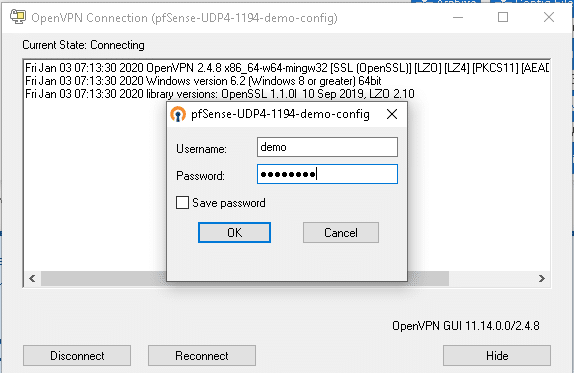
Once installed, open the OpenVPN GUI App from the start menu and log in with the username and password you configured. The first time you run this you will need to allow OpenVPN through the firewall which will require admin rights but these should not be needed for subsequent connections.
Once the handshake is complete the VPN should be connected. You can verify this by moving to a different network, either public WiFi or a mobile hotspot and opening your firewall’s LAN IP address in a web browser. If everything is working you will see the pfSense login page.