Ubiquiti’s UniFi product lineup has seen enormous growth in popularity due to its range of high quality access points. While you will usually find professional grade access points in businesses instead of homes, they provide a benefit in any building. This is especially true for large homes or older buildings with thick walls where a single AP isn’t enough.
Many larger homes end up using multiple separate access points with a mix of repeaters. This results in a confusing mix of networks with devices connecting to a sub-optimal AP, causing weak signal. UniFi resolves this by managing all access points from a central controller and treating them as a single network. This saves you having to join your devices to several different networks and allows the APs to intelligently hand devices off to each other as you roam around the house. This ensues that you are always communicating with the AP that has the strongest signal.
UniFi can act solely as an access point without performing NAT. This means that unlike mesh WiFi systems which are traditionally used to expand coverage in a home setting, you shouldn’t run in to communications issues between wireless and wired devices in your home.
Why not another product?
While there are plenty of other good products on the market, there are several reasons why UniFi is a strong contender. When compared to other commercial solutions, UniFi hardware is priced very reasonably and is widely available from consumer outlets. This means you don’t need to procure hardware through trade-specific distribution networks. One other advantage is the simplicity of setting up devices. Once you have the controller set up, you can add new devices by adding them to the network. They will appear in the dashboard and can you can easily configure them in just a few clicks.
For me, the flexibility around the controller software is the key selling point. Some providers require you to buy an expensive hardware controller in addition to the APs. Other systems can only be managed from the cloud which some people may view as a security risk. The UniFi controller can instead be installed on any Windows, Mac or Ubuntu PC (or VM), allowing you to run it on hardware you already have. That’s not to say that you can’t run it in the cloud or have a dedicated controller. UniFi provide various models of CloudKey(paid link) for users who wish to avoid the effort of building their own controller. The basic model will be sufficient for any home or office with fewer than a couple of dozen managed devices. Additionally, while not owned by UniFi, the HostiFi company offers cloud hosted controllers requiring no on-premisies management hardware.
Setting up the UniFi controller on Ubuntu
While the controller software can be installed on any PC, a dedicated server will simplify management. Windows and Ubuntu are both supported but Ubuntu is preferred due to its lack of licensing costs and smaller footprint. The instructions provided here are for Ubuntu Server 20.04. While an LTS version of Ubuntu Server is preferred, any recent version of Ubuntu Server or Desktop can be used.
The system requirements depend on the number of managed devices but 1 CPU core, 2GB of RAM and 25GB of storage should be enough in most cases. The UniFi controller software isn’t in the main Ubuntu repos so we need to add the correct repo. We must also install the GPG keys so the repo is trusted:
echo 'deb https://www.ui.com/downloads/unifi/debian stable ubiquiti' | sudo tee /etc/apt/sources.list.d/100-ubnt-unifi.list
sudo wget -O /etc/apt/trusted.gpg.d/unifi-repo.gpg https://dl.ui.com/unifi/unifi-repo.gpg
Next, update the apt cache and install the UniFi controller along with its prerequisites:
sudo apt update && sudo apt install ca-certificates openjdk-8-jdk apt-transport-https unifi -yOnce the install is finished, check that the service is running:
systemctl status unifi.serviceIf the service shows as failed or not running, restart the service with:
sudo systemctl restart unifi.serviceConfiguring the UniFi controller
Check the status again and verify that the service is running. Once everything is up and running, open a web browser and go to https://[server’s IP address]:8443. You will need to accept the self-signed certificate warning.
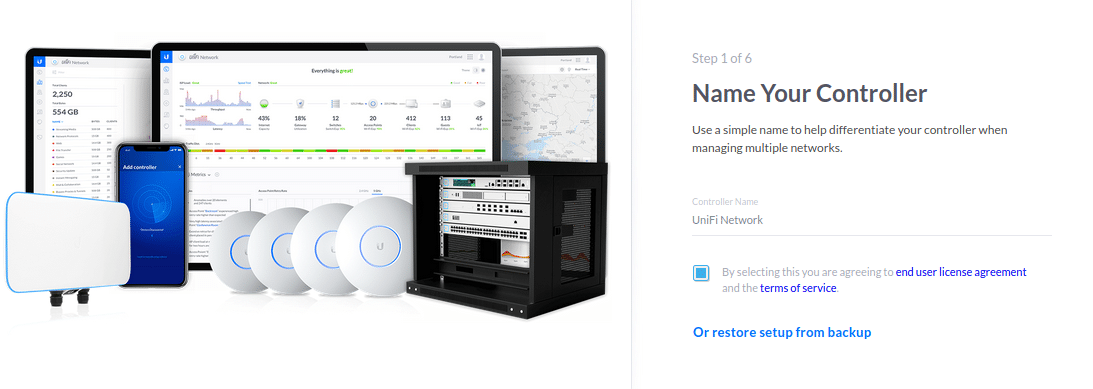
Next, chose a name for your controller and accept the terms and conditions.
On the next screen, sign in with your UniFi account. If you want to be able to access your controller through Unifi’s cloud enter your login details here.
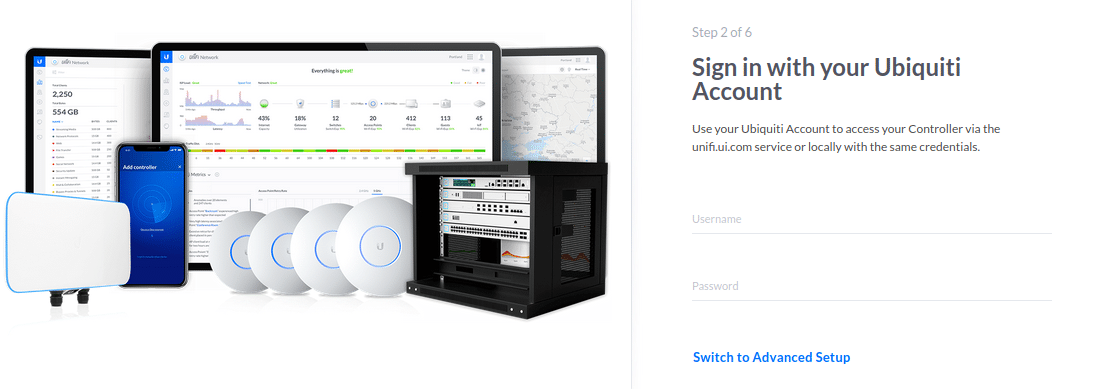
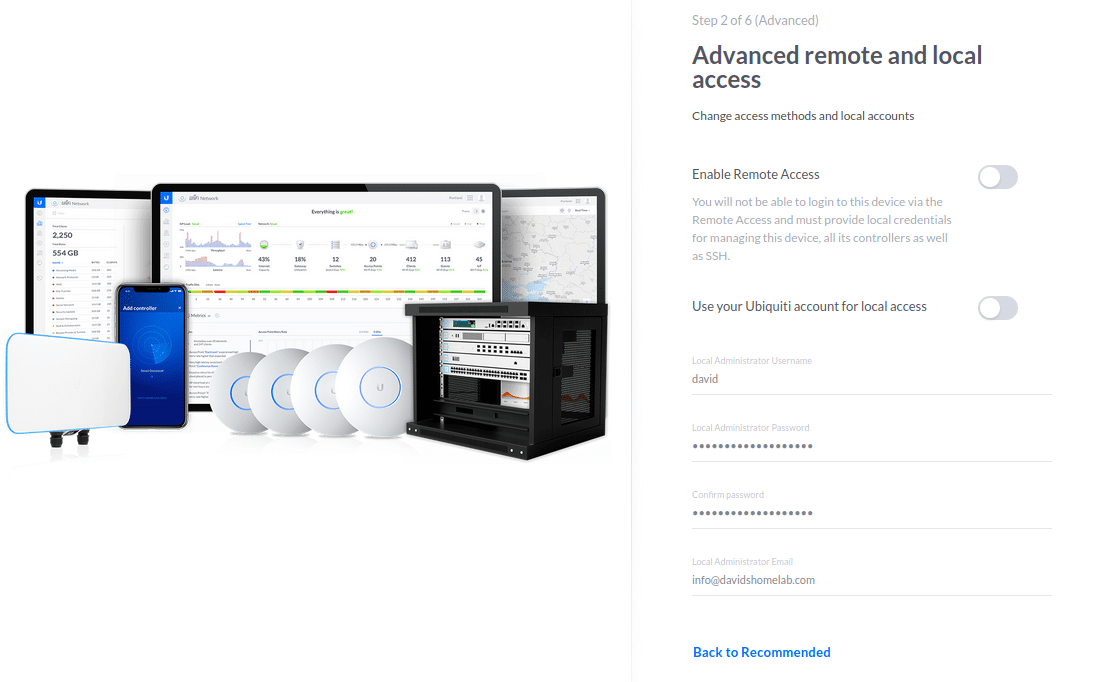
If you want to keep your controller local to your network, set up a local account, click “Switch to Advanced Setup”. Uncheck both checkboxes and set up a local username and password.
On the next screen, leave auto backup and network optimisation enabled.
Installing on an Ubuntu server is one of the simplest and cheapest ways to deploy the UniFi controller.
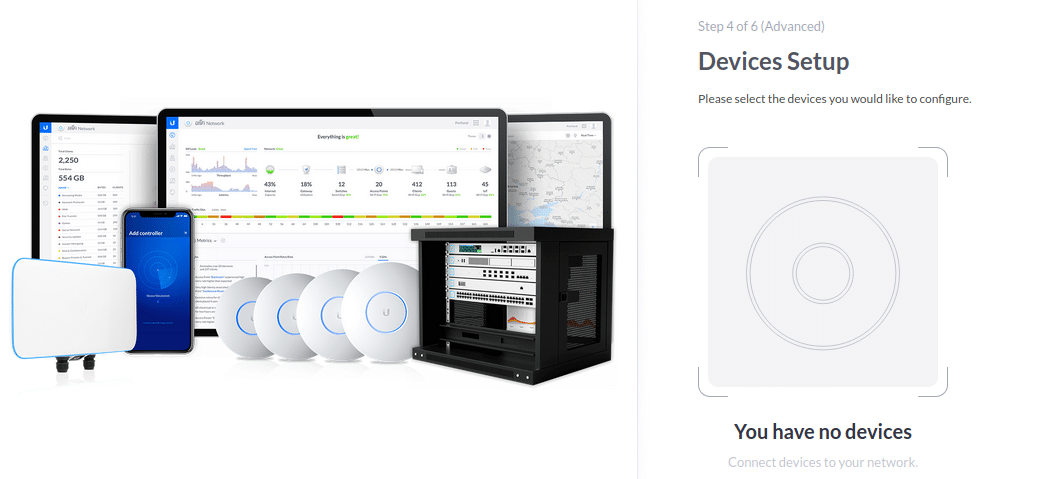
If you already have your devices, you can now choose to set them up. If you are just setting up the controller in preparation for receiving the devices, you can add them later.
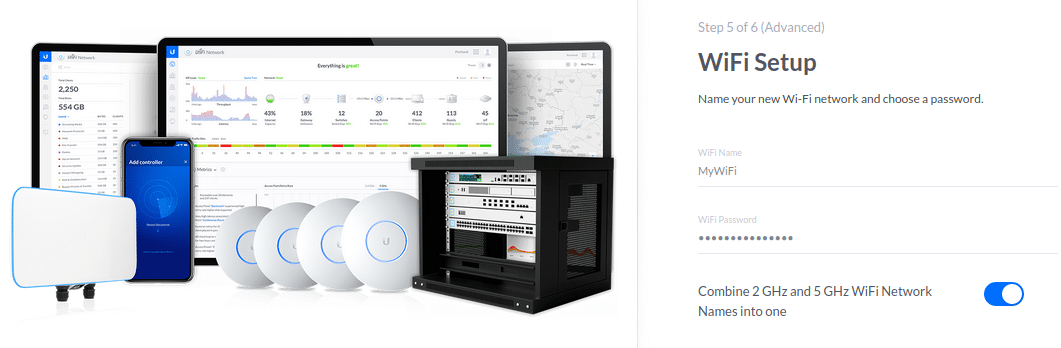
Enter a WiFi network name and password. If you plan to have multiple SSIDs you can add the rest later, just enter your primary one here.
Finally, confirm your settings and set your location and time zone.
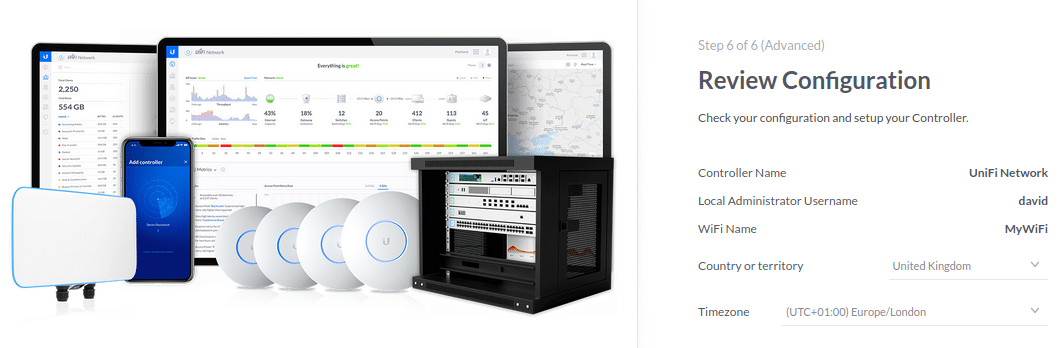
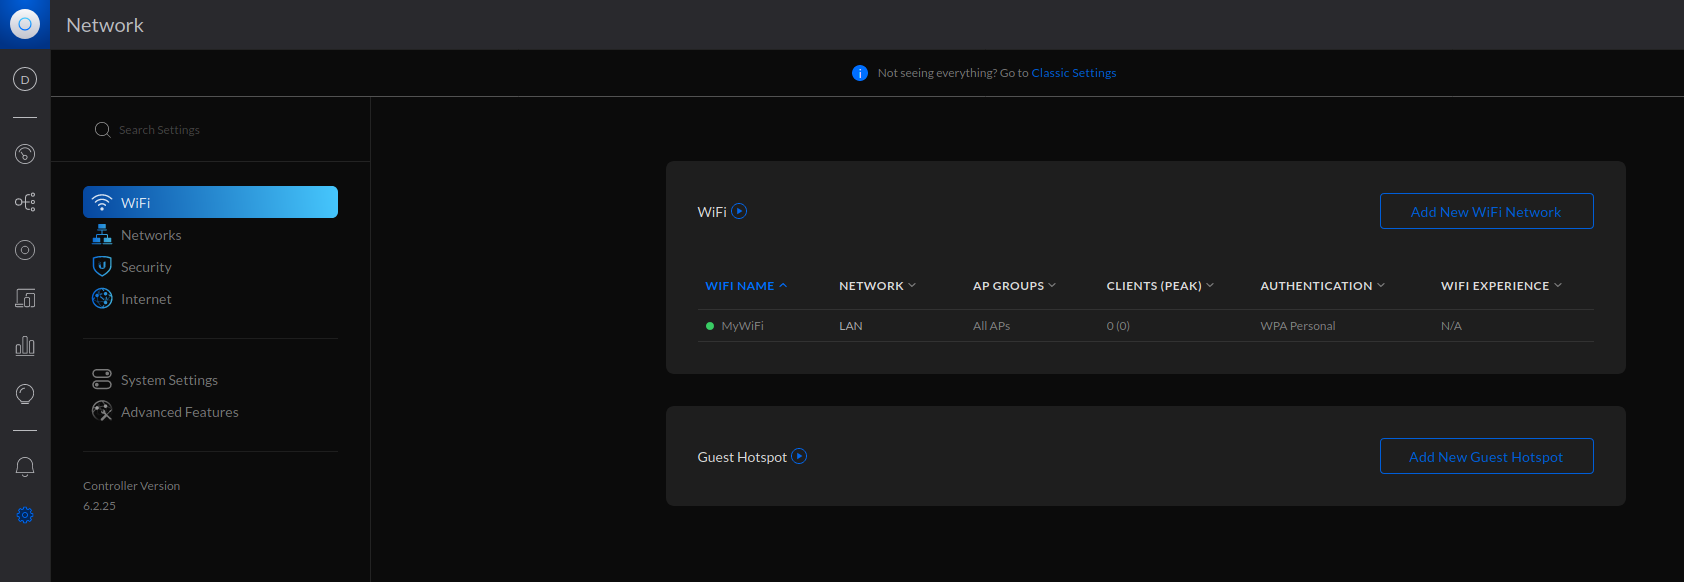
The wizard will redirect you to the main dashboard and your network will be set up.
There is plenty more you can do with UniFi hardware such as having multiple SSIDs on separate vlans, captive portal and MAC address based vlan assignments. Come back soon for more guides.