As the number of Linux systems you want to manage increases, you will begin to see a need for more integrated host and user management. This allows for single sign on so you don’t need to maintain credentials for every system and simplifies creating service users to perform tasks across the whole domain such as running Ansible playbooks. FreeIPA (identity, policy, audit) is an identity management system similar to Microsoft Active Directory. It can be used for managing users, DNS, SSL certificates and autofs mounts in multi-host Red Hat and Debian (including derivatives) domains.
Configure your server
FreeIPA server can be installed on the same distros that the client can be installed on, these are CentOS, RHEL, Fedora, Debian and Ubuntu. For this tutorial I will be using CentOS 8. It is not recommended to run any other software on a FreeIPA server so you should spin up a fresh VM to dedicate to this task. You’ll need to provision at least 4GB of RAM for the installer to succeed although this can usually be lowered to about 2GB after installation is complete unless this is a large deployment where the server is expected to be handling a large number of requests.
Preparation
To begin with you will need to choose a domain name. Take some care over choosing this as it will not be possible to change it later. If you own a domain name you can use a subdomain of that or if you’d prefer to make up a name use a non existent tld such as .lan. I’ll use internal.davidshomelab.com in my example so substitute references to it for your chosen domain name. Once you have chosen the name, append it to the hostname of your server using the hostnamectl command:
hostnamectl set-hostname ipa1.internal.davidshomelab.comWe will also need to set a static IP address for our server to allow the clients to find it. This can be done either by setting a static lease in DHCP or manually setting a static IP in the server. To set a static IP using nmcli on the server run the following commands:
nmcli con showThis will return a list of connection profiles and the interfaces they are assigned to. In my case, the connection profile is called “System \ eth0”. Once you know which connection you wish to modify run the following commands to disable DHCP, set a static IP, set a default gateway and configure DNS:
nmcli con mod System\ eth0 ipv4.address 172.16.24.5/24 (change this to the actual IP you plan to use)
nmcli con mod System\ eth0 ipv4.gateway 172.16.24.1 (change this to your actual default gateway)
nmcli con mod System\ eth0 ipv4.dns 8.8.8.8
nmcli con mod System\ eth0 ipv4.method manual
nmcli con up System\ eth0
The IPA server installer will expect to be able to resolve this name before you have configured the server to be a DNS server so make an entry for it in /etc/hosts in the following format:
172.16.24.5 ipa1.internal.davidhshomelab.com ipa1Install the FreeIPA server package
Unlike previous versions of CentOS, installing FreeIPA on CentOS 8 requires enabling the idm AppStream module to access all the packages we will need. Do this by running the following command:
yum install @idm:DL1Now install the freeipa-server packages. The DNS and Bind packages are not strictly necessary and can be omitted if you don’t want to use integrated DNS. However, FreeIPA depends heavily on DNS for its operation so not doing this will result in a lot of manual DNS updates in a separate server to keep everything working correctly.
yum install freeipa-server ipa-server-dns bind-dyndb-ldapOnce all the packages are installed, run the setup utility. There are several options you can pass to to the utility via the command line but you will be prompted for any options that are required but you have not specified. The only command we will pass is the one to configure FreeIPA as a DNS server:
ipa-server-install --setup-dnsThe setup utility will then prompt you for the information it needs to configure FreeIPA. If there is a default option it will be shown at the end of the prompt in square brackets. If you are happy with this default you can just hit return without typing it out. The prompts are as follows:
| Server Hostname | As we have already set the hostname, check that it has detected it by default and hit return |
| Domain Name | The domain name is automatically derived from the hostname so check the default is correct and accept it |
| Kerberos Realm Name | Typically this will be the same as the domain name but converted into upper case. Accept the default value |
| Directory Manager Password | The Directory Manager is effectively the admin user for the LDAP database. If you need to perform manual maintenance on the LDAP database this is the user you will authenticate as. This password will be rarely needed so keep it in a safe place |
| IPA Admin Password | This is the password for the default admin user |
| DNS Forwarders | Here we configure where FreeIPA will forward DNS requests for hosts that it does not have records for. You can use any DNS server accessible from the FreeIPA server such as Google public DNS (8.8.8.8) or your Pi-Hole if you have one set up. By default the installer will select whatever you have configured as the default DNS server for the server, in this case 8.8.8.8 |
| Missing Reverse Zones | This will tell FreeIPA to generate a reverse DNS zone for the network. This is not needed for normal operation but allows you to determine a hostname based on an IP address and may be beneficial if using network scanning or traffic inspection tools. Accept the default to create the reverse zone |
| Configure Chrony with NTP server or pool address | As time synchronisation is important for kerberos, you may wish to use the IPA server as an NTP server to ensure time across the domain stays in sync. Enter “yes” for this option and use pool.ntp.org as the NTP source pool |
You should now see output similar to the below. Check the details are all as you expected and then type “yes” and hit return to begin the configuration.
The IPA Master Server will be configured with:
Hostname:       ipa1.internal.davidshomelab.com
IP address(es): 172.16.24.5
Domain name:    internal.davidshomelab.com
Realm name:     INTERNAL.DAVIDSHOMELAB.COM
The CA will be configured with:
Subject DN:   CN=Certificate Authority,O=INTERNAL.DAVIDSHOMELAB.COM
Subject base: O=INTERNAL.DAVIDSHOMELAB.COM
Chaining:     self-signed
BIND DNS server will be configured to serve IPA domain with:
Forwarders:       8.8.8.8
Forward policy:   only
Reverse zone(s):  24.16.172.in-addr.arpa.
NTP pool:       pool.ntp.org
Continue to configure the system with these values? [no]:
The script will then set up your server using the information you have given. It can take a little while to set up so take a break for a while and come back later. If the installation fails you will need to uninstall the already configured components before you will be allowed to start again. If this happens, fix whatever the issue was and run the following commands to restart the installation:
ipa-server-install --uninstall
ipa-server-install --setup-dns
Once the install is completed, run the following commands to open the required ports in the firewall:
firewall-cmd --add-service=http --add-service=https --add-service=ldap --add-service=ldaps --add-service=kerberos --add-service=dns --add-service=ntp --add-service=kpasswd --permanent
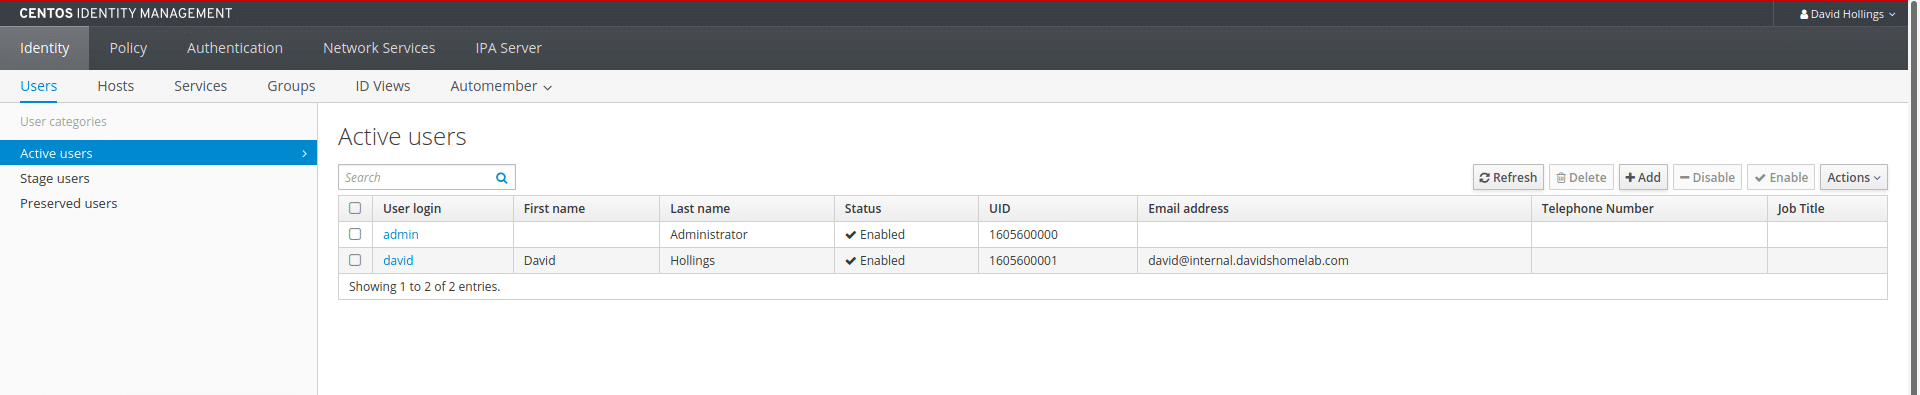
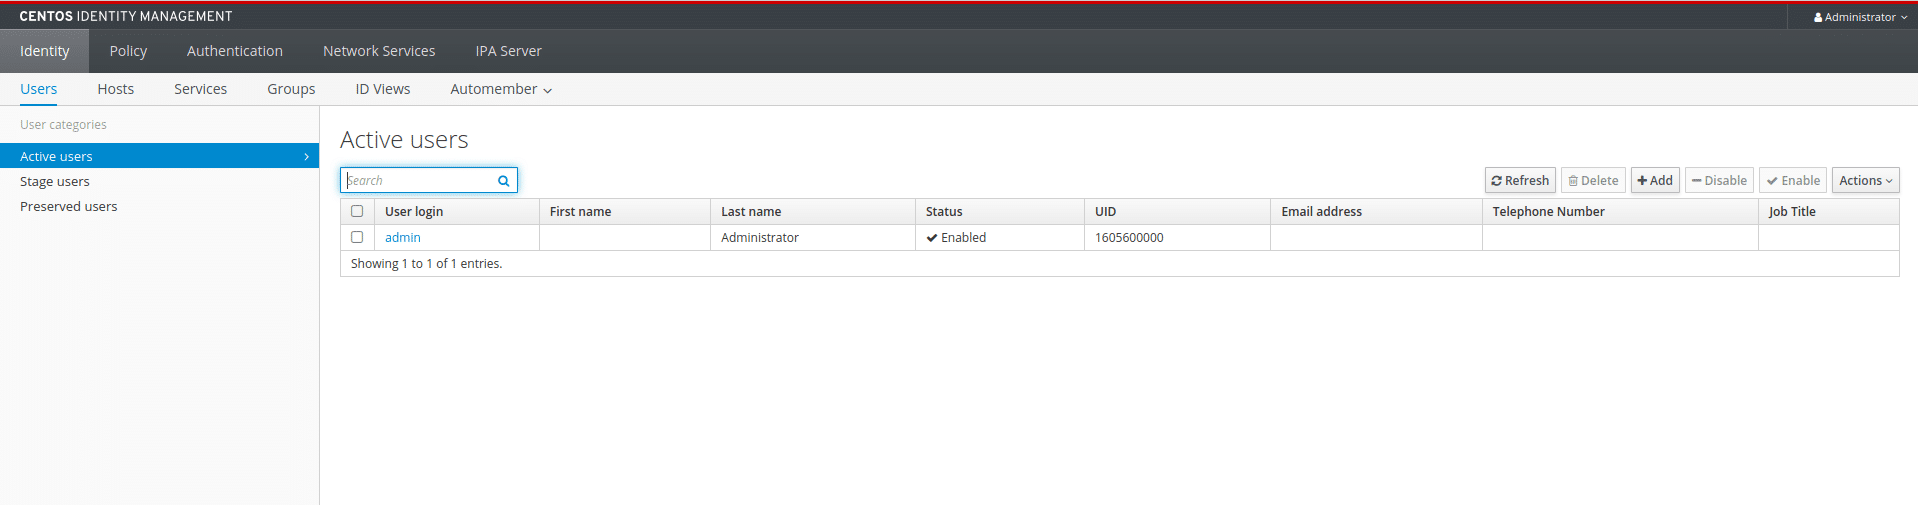
firewall-cmd --reloadGo to the server’s IP address in a web browser and accept the certificate warning. Log in with the username “admin” and the password we set previously. If all is well, you should see something like the screenshot below. We see we currently only have the single default admin account but we have menus to manage users, hosts, groups etc.
Add a user
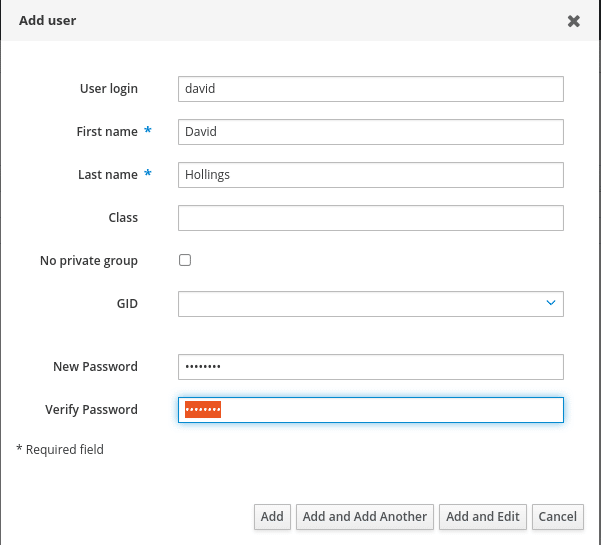
In most cases you will not want to use the built in admin user for daily use so let’s go ahead and create a separate user account. Click the “Add” button to add a new user. Set a login name, a full name and a password. If not specified, the Class and GID fields will be filled automatically. Once the user is added you can click on their username in the list to edit more detailed settings such as their address and contact details
One setting you will probably wish to amend is to make your user a member of the “admins” group. This will give you permission to add PCs to the domain and make changes to FreeIPA without needing to be logged in as the admin user. To do this go to User Groups, click Add and move admins from “available” to “prospective”. Click Add to confirm the changes.
You will probably want some users to have sudo permissions on client hosts. To do this, go to Policy > Sudo > Sudo Rules and click Add. The sudo policy settings gives a lot of flexibility in terms of allowing users sudo access to specific hosts, to run specific commands or to impersonate specific uses. However, for the sake of simplicity we will give ourselves full administrative rights over all hosts in the domain. Accordingly, we will name our policy something descriptive like “Full Sudo Access”. Once in the policy editor change the following settings:
| Who | Click “Add” under users and add the user we have just created. Alternatively you could apply the policy to a group of users and then add your user to that group. For larger deployments this is recommended as it is simpler to manage and audit who has which permissions |
| Access this host | Check the radio button next to “Any Host”. This grants sudo permissions on all hosts in the domain. If you want to limit the access to a specific host or to a set of hosts you could instead add the host or host group to the allow list |
| Run commands | Check the radio button next to “Any command”. Again, you could specify command groups if you want users to be able to run some commands as root but not others. E.g. mounting drives but not installing software |
| As whom | Check the radio button next to “Anyone”. As before, if you want members of this policy to only impersonate specific users you could create an allow list with just those users on it |
Once you have configured the policy to your liking, scroll back to the top and click “Save” to apply it. Repeat the process to create as many users and access policies as you need.
Finally, check your user creation has worked by logging in to the server as your new user and running the following command:
sudo -iIf the username in the prompt changes to “root” after doing this and entering your password then you know that the account creation and sudo policy have worked and you are ready to begin adding hosts to your domain.
Adding clients
Before we add a client we will need to make sure it is using our FreeIPA server as its DNS server. This can be done either by setting a static DNS server on the host or by editing the DHCP settings for our network. However you choose to do it, ensure that the host can resolve the domain name of the FreeIPA server before proceeding. You can do this using nslookup, ping or attempting to log in via SSH.
Install FreeIPA client software
As with the server, I will be installing on CentOS 8 but any RHEL or Debian derived distro will follow roughly the same process. As FreeIPA will automatically detect the domain settings based on the system hostname convert the hostname to a fully qualified domain name using the following command with adjustments for the hostname of the client and the domain name you have chosen:
hostnamectl set-hostname ipaclient1.internal.davidshomelab.comInstall the client software by running the following command:
yum install freeipa-clientAs with the server packages this will pull in a lot of packages and will take some time to install. Once it is complete we are ready to join the host to the domain by running:
ipa-client-install --mkhomedirBy appending –mkhomedir to the command, we tell FreeIPA to automatically create a home directory for users when they log in to the server. Do not select this option if you want to mount remote home directories from an NFS server. I’ll save instructions on that for a future article but if you want to try it, you’ll want to be looking for Automount in the Network Services section of the control panel.
If you get a prompt saying discovery was successful then it shows your DNS is set up correctly. If not, double check you can ping the IPA server and try again. Say yes to configuring Chrony with the server’s pool address. This is optional but will help to ensure time stays in sync. Enter the pool address we set for the server. In this case, pool.ntp.org. You will then be presented with a summary of the settings and asked if you wish to proceed. If they all look correct, type “yes” and hit return.
You will then be asked to enter the credentials of a user authorised to add computers to the domain. If you set your user to be a FreeIPA admin you can use your own credentials. If not, use the built in admin account.
The script will show output similar to the following while it is running and will hopefully say the installation was successful at the bottom:
Successfully retrieved CA cert
    Subject:     CN=Certificate Authority,O=INTERNAL.DAVIDSHOMELAB.COM
    Issuer:      CN=Certificate Authority,O=INTERNAL.DAVIDSHOMELAB.COM
    Valid From:  2020-03-08 23:06:58
    Valid Until: 2040-03-08 23:06:58
Enrolled in IPA realm INTERNAL.DAVIDSHOMELAB.COM
Created /etc/ipa/default.conf
Configured sudoers in /etc/authselect/user-nsswitch.conf
Configured /etc/sssd/sssd.conf
Configured /etc/krb5.conf for IPA realm INTERNAL.DAVIDSHOMELAB.COM
Systemwide CA database updated.
Hostname (ipaclient1.internal.davidshomelab.com) does not have A/AAAA record.
Missing reverse record(s) for address(es): 172.16.24.51.
Adding SSH public key from /etc/ssh/ssh_host_ecdsa_key.pub
Adding SSH public key from /etc/ssh/ssh_host_ed25519_key.pub
Adding SSH public key from /etc/ssh/ssh_host_rsa_key.pub
SSSD enabled
Configured /etc/openldap/ldap.conf
Configured /etc/ssh/ssh_config
Configured /etc/ssh/sshd_config
Configuring internal.davidshomelab.com as NIS domain.
Client configuration complete.
The ipa-client-install command was successful
You can now check you can log in as a domain user to the host and add any other hosts you need to add. Of course there is much more you can do with FreeIPA such as adding users and hosts to groups and creating policies to apply to those groups, configuring automatic mounting of NFS shares and issuing certificates to authenticate internal resources. Come back for future articles on how to do these.