Most of my posts feature network services that you can set up at home. However, accessing these services from outside your local network can pose a challenge. While it would be possible to set up port forwarding for each service this can become a hassle when configuring multiple services. It can also pose a security risk as many network protocols are not supposed to be used on the public internet. The easiest way to provide full secure access to your local network from remote locations is using a VPN to encapsulate your traffic in an encrypted tunnel to access your local network.
So why WireGuard? Yes, I know that it is still in beta and hasn’t had any significant security auditing but it provides several advantages for this type of setup. Firstly, it is a lot simpler to configure than OpenVPN or IPSec as it doesn’t require any PKI and uses shared keys in a way which will be familiar to OpenSSH users. WireGuard also doesn’t need to recreate the tunnel whenever the connection is lost so you can roam between different networks without having to restart the connection. This is particularly handy on mobile phones where you might want to route some traffic such as DNS (pi-hole) over a VPN so you have ad-blocking regardless of the network you are connected to.
While I like WireGuard for personal devices or for site-to-site VPNs I won’t pretend it’s perfect for everything. WireGuard doesn’t support DHCP or allow username and password logins for the VPN, it has to be configured on a per-device basis and therefore might not be the ideal choice for corporate remote access VPNs. Additionally its newness and lack of security auditing make it a poor choice if you need it to protect highly sensitive information.
Setup
Preparing your network environment
If you do not have too many network services already set up which would be impacted by an IP address change and your network uses a common subnet such as 192.168.0.0/24, 192.168.1.0/24 it is worth adjusting your DHCP settings on your LAN to use a more uncommon subnet. This is because when you connect in from a public network your endpoint’s local IP will probably be in one of these ranges, leading to an address conflict. i.e. if your PC tries to access 192.168.1.20, your PC may route this down the tunnel or try to access that host on its local network (e.g. coffee shop WiFi). While it is possible to work around this using static routes it is a pain so, if possible, try to use an uncommon subnet on your home LAN.
Preparing your WireGuard endpoint
I will be demonstrating the setup using a CentOS 7 server and Ubuntu 18.04 client but the majority of steps can be adapted for any other Linux distribution with a little effort so if you plan to use a different distribution or even Windows or macOS for your server many of the instructions should be applicable.
From your fresh CentOS 7 install, run yum -y update to install any available updates
Install WireGuard from Copr by running the following commands as root:
curl -Lo /etc/yum.repos.d/wireguard.repo https://copr.fedorainfracloud.org/coprs/jdoss/wireguard/repo/epel-7/jdoss-wireguard-epel-7.repo
yum install epel-release
yum install wireguard-dkms wireguard-tools
If installing on another distribution, instructions for installing on basically anything can be found on WireGuard’s website.
Configuring your server
We will be configuring our tunnel using the wg-quick script which comes as part of the wireguard-tools package. This tool reads a config file from the /etc/wireguard directory by default so this is where we will place our config file. Make the directory and change the permissions so it can only be accessed by the root user:
mkdir /etc/wireguard
chmod 700 /etc/wireguard
cd /etc/wireguard
We now need to generate our private and public keys for the server. These act similarly to SSH keys in that the private key will only be stored on the server and the public key will be copied to the peer configuration for all of the clients. The public key from the client will in turn be copied to the peer configuration on the server. To generate a keypair run the following command as root:
wg genkey | tee private.key | wg pubkey > public.keyThis will give us two files called private.key and public.key containing the respective keys which can be added to the config files.
We now create a config file for the tunnel. When the tunnel is active the interface name will be taken from the name of the config file so wg0.conf will result in an interface called wg0. Name the file however you like according to your preferred interface name but note that the name must end with .conf for wg-quick to detect it. Open the config file in your preferred text editor and enter the following basic configuration. I have added comments above each line to explain what it does:
[Interface]
# This is the virtual IP address, with the subnet mask we will use for the VPN. Note that this must not be on our LAN subnet and should be an uncommon subnet to avoid address conflicts
Address = 10.125.37.1/24
# The PostUp instructions are commands to be run when the VPN tunnel is activated, in this case we configure forwarding of traffic across the tunnel and enable NAT on eth0 (if you are using a different interface change this value)
PostUp   = iptables -A FORWARD -i %i -j ACCEPT; iptables -A FORWARD -o %i -j ACCEPT; iptables -t nat -A POSTROUTING -o eth0 -j MASQUERADE
# PostDown instructions are instructions to be run when the tunnel is deactivated. In this case we simply delete the firewall rules we created when the connection is brought up.
PostDown = iptables -D FORWARD -i %i -j ACCEPT; iptables -D FORWARD -o %i -j ACCEPT; iptables -t nat -D POSTROUTING -o eth0 -j MASQUERADE
# This is the port the server will listen on, use any unused port for this as there is not an official one
ListenPort = 51845
# Copy the private key you saved to /etc/wireguard/private.key
PrivateKey = [your private key]
As our server will be acting as a router, we will need to enable IPv4 forwarding by running the following command:
sysctl net.ipv4.ip_forward=1To make this change persistent across reboots we also need to add the following line to /etc/sysctl.conf
net.ipv4.ip_forward=1Finally, open port our chosen port in the firewall:
firewall-cmd --permanent --add-port=51845/udp
firewall-cmd --reload
We can now test our configuration by running the following commands:
wg-quick up wg0
wg show
If all is well, wg show should output something like this:
[root@wg wireguard]# wg show
interface: wg0
  public key: ljDbmpp6GLMigE19i4gRqzypnQ29ptZT91N0Lyt3pBg=
  private key: (hidden)
  listening port: 51820
We can now take the interface down by running wg-quick down wg0 and begin configuring our first client
Configuring a client
Much like the server, we begin by installing the WireGuard packages. For Ubuntu this is done by running:
sudo add-apt-repository ppa:wireguard/wireguard
sudo apt-get update
sudo apt-get install wireguard
We will also need to install resolvconf as it is not installed by default on Ubuntu
sudo apt install resolvconfLike on the server we create our /etc/wireguard directory, lock down the permissions and create our public and private keys:
mkdir /etc/wireguard
chmod 700 /etc/wireguard
cd /etc/wireguard/
wg genkey | tee private.key | wg pubkey > public.key
Again, we make our wg0.conf file using the following template:
[Interface]
# Use an address on the same subnet as our server
Address = 10.125.37.20/24
# Set a port to listen on. This can match the listen port on the server but it doesn't have to
ListenPort = 51845
# The private key you just generated
PrivateKey = [key from private.key]
# If you want to use a specific DNS server for this connection specify it here, multiple servers can be specified by separating them with commas
DNS = 10.100.4.20
Again, we can bring the interface up using wg-quick and check if wg-show produces output to check our configuration.
Making the hosts talk to each other
We now have WireGuard interfaces on each host that are ready to accept connections so it is time to tell them about each other. For this we need to inform each endpoint the other’s public key and IP address by adding a [Peer] section to wg0.conf on each host.
For the server our wg0.conf file should now look like:
[Interface]
Address = 10.125.37.1/24  # This is the virtual IP address, with the subnet mask we will use for the VPN
PostUp   = iptables -A FORWARD -i %i -j ACCEPT; iptables -A FORWARD -o %i -j ACCEPT; iptables -t nat -A POSTROUTING -o eth0 -j MASQUERADE
PostDown = iptables -D FORWARD -i %i -j ACCEPT; iptables -D FORWARD -o %i -j ACCEPT; iptables -t nat -D POSTROUTING -o eth0 -j MASQUERADE
ListenPort = 51820
PrivateKey = [server private key]
[Peer] # client 1 ## it is advisable to make a comment by each peer to say what it refers to as the list of peers quickly becomes confusing once several have been added
PublicKey = [client public key]
AllowedIPs = 10.125.37.20/32
One important point to note here is that the subnet in the peer file refers to all the IP addresses which can be routed via that peer so if the peer only has a single IP address it must be entered as a /32 regardless of what subnet the peer believes itself to be on. If you wanted to configure a site to site VPN you would specify a range here and enable IP forwarding on both ends of the tunnel.
We now edit the wg0.conf file on the client to tell it about the server:
[Interface]
Address = 10.125.37.20/24
ListenPort = 51845
PrivateKey = [client private key]
DNS = 10.100.4.20
[Peer] # server
Endpoint = wireguard.mydomain.com:51845
PublicKey = [server public key]
AllowedIPs = 0.0.0.0/0
As the client will be initiating the connection we must set an endpoint. This can just be an IP address but as you most likely have a dynamic IP address on your home network your best option is to set up dynamic DNS and use the hostname as your endpoint. If your endpoint is behind a NAT (it probably is), make sure to set up port forwarding on your gateway to send connections on port 51845 to your WireGuard server.
Additionally, you will notice that the AllowedIPs for the client is not a single host. This is because we want to route multiple IPs via our tunnel. In this case we will be routing all traffic through the tunnel but you can specify only certain networks by entering a comma separated list (e.g. 192.168.20.0/24,10.100.4.0/24,10.125.37.20/24). If you only want certain networks to be routed via the tunnel make sure that the network your tunnel endpoints are part of is part of the list otherwise it won’t work. In this case this is 10.125.37.20/24.
Testing the connection
If all has gone to plan our connection should now be correctly configured, we can now bring the interface up at both ends by running the following command on the server and then on the client:
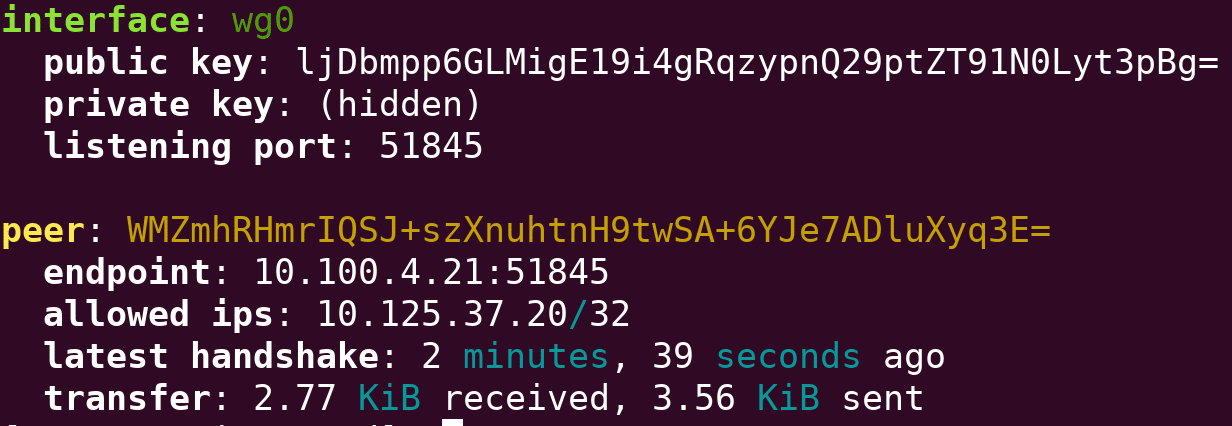
sudo wg-quick up wg0If we now run wg show on the client or the server we should see something like the following:
interface: wg0
  public key: WMZmhRHmrIQSJ+szXnuhtnH9twSA+6YJe7ADluXyq3E=
  private key: (hidden)
  listening port: 51845
  fwmark: 0xca6c
peer: ljDbmpp6GLMigE19i4gRqzypnQ29ptZT91N0Lyt3pBg=
  endpoint: wireguard.mydomain.com:51845
  allowed ips: 0.0.0.0/0
  transfer: 0 B received, 888 B sent
If we now ping our server we should get responses and see the transfer statistics in wg show increasing. We should also be able to access network resources on the LAN side via our tunnel. Assuming all has gone to plan, you now have a VPN which can protect your data when connecting from untrusted networks and allow you to access resources on your home network.
Running WireGuard as a service
wg-quick comes with a built in systemd service, you can easily configure WireGuard to start on boot by running:
systemctl enable wg-quick@wg0.serviceIf you have called your interface something other than wg0 adjust your service name accordingly
1 thought on “Access your home network from anywhere with WireGuard VPN”
Comments are closed.