Typical ISP-provided home router/firewall products offer only the most basic of functionality. Most will include port forwarding, basic DHCP and some ability to customise firewall rules. However, if you’re looking to play with more advanced features such as static routes, advanced DHCP options, vlans, VPNs or advanced network filtering and monitoring these products come up short. pfSense is a simple open source firewall and router distribution, with full enterprise functionality. In this article I will detail the steps to get a functioning pfSense firewall set up. Future articles will detail more advanced features.
Choosing your hardware
Of course, while the software may be free you will still need some hardware to run it on. pfSense can run on any x86 64-bit PC although you will probably want to choose one with at least 2 network interfaces, one for WAN and one for LAN (if you have a vlan capable switch it is possible to use a device with only one network interface but this is an advanced configuration which is not covered here). Additionally, if your current router also serves as a wireless access point, you will either want to use hardware which includes a wireless antenna or purchase a dedicated access point.
In terms of hardware, it can really be anything as long as it has an x86-64 CPU, so you can use an old PC, a virtual machine, or purchase a dedicated firewall appliance. pfSense is owned by Netgate and you can buy a range of firewalls directly from them preloaded with pfSense. Many other manufacturers also make small PCs with multiple network interfaces designed for this purpose. Searching for “firewall PC” on Amazon should give you a variety of options. One thing to note when using older or cheaper CPUs is that you should at least choose one with AES-NI support. AES-NI is a set of hardware instructions in modern (since 2010) CPUs designed to speed up AES cryptographic operations which will provide a significant performance boost when using VPNs. AES-NI is expected to become a required feature in a future release of pfSense so if using an older or low-cost CPU check that it supports it or you may find yourself locked out of future upgrades.
Installing the software
Download the pfSense ISO from https://www.pfsense.org/download/, choose the AMD64 architecture and select a mirror near your location. If you are installing on physical hardware you will now need to write the ISO to a USB key. On macOS or Linux you can use the following command to do this:
sudo dd if=/path/to/iso of=/dev/sdX bs=1M ; syncOn Windows you can use a tool like Rufus or Etcher to do this. Etcher also supports macOS and Linux and may be preferable for users who are less comfortable with the command line. If you are installing on a VM you can skip this step.
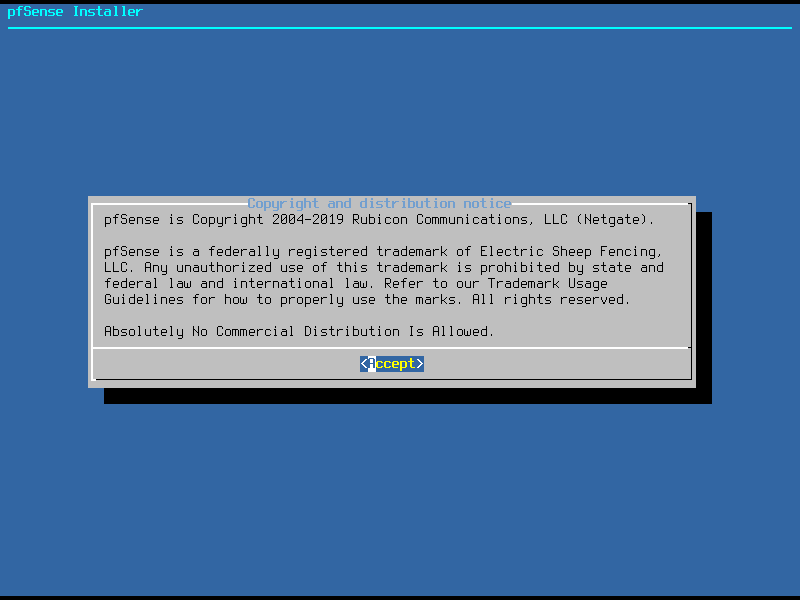
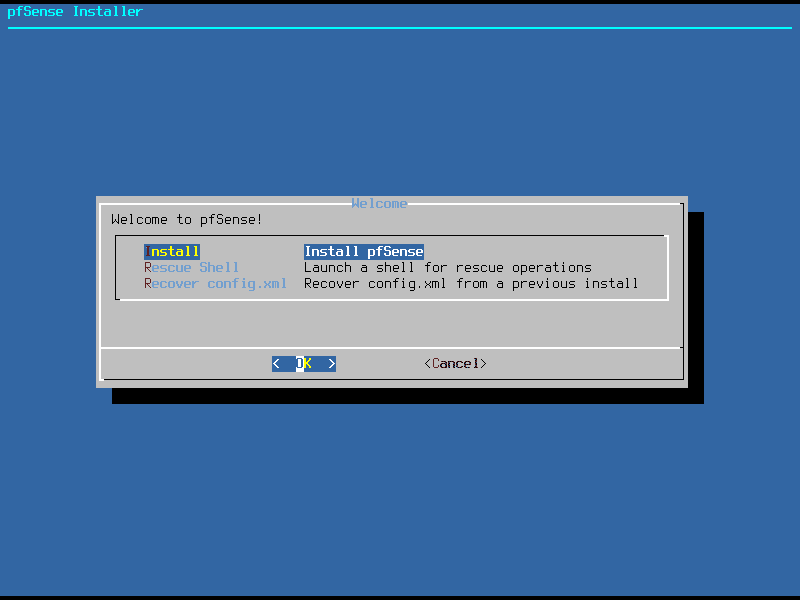
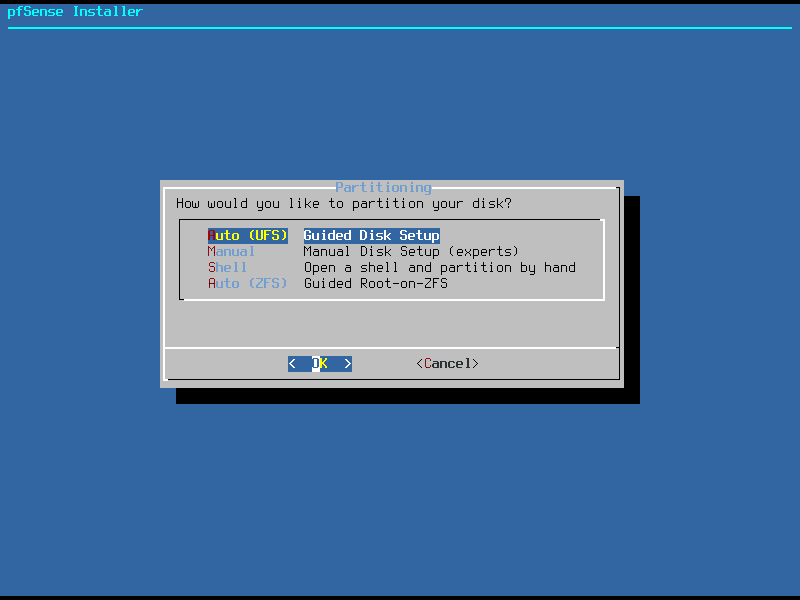
When you boot from the USB key or ISO you will be taken to the pfSense installer. The installation is very simple, just accept the license, select “install”, select a keymap and decide how you want to partition and format your disk. Here you get two automatic partitioning options, you can select either the ZFS or UFS file systems. You also have the option to manually create partitions or even open a system shell for more advanced configurations. For the sake of simplicity we will use “Auto (UFS)”. pfSense will now install and prompt you to reboot to the console.
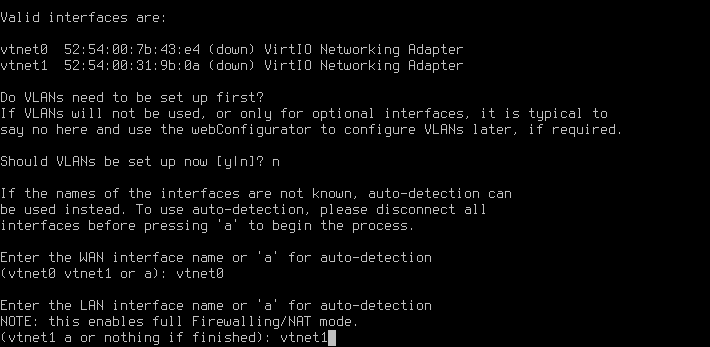
Before we can access the web interface we will need to do some configuration on the console, this involves creating any necessary vlans (if you have decided to use a single network interface and a vlans to separate your LAN and WAN networks you will want to say “yes” to this”), and we will also need to assign interfaces to their required zones.
As we are not using vlans in this tutorial we select “n”, then choose which interface will be WAN and which will be LAN as in the picture below.
pfSense will now configure itself and take you to the default prompt. From here we have various options for managing the firewall from the console. These include shutdown/reboot, reassign interfaces, change IP addresses, restoring configuration from backups and accessing a system shell for advanced functionality. Generally, however, we will be configuring pfSense from the web interface. On a PC connected to the LAN interface, go to https://192.168.1.1 and accept the warning about the self signed certificate.
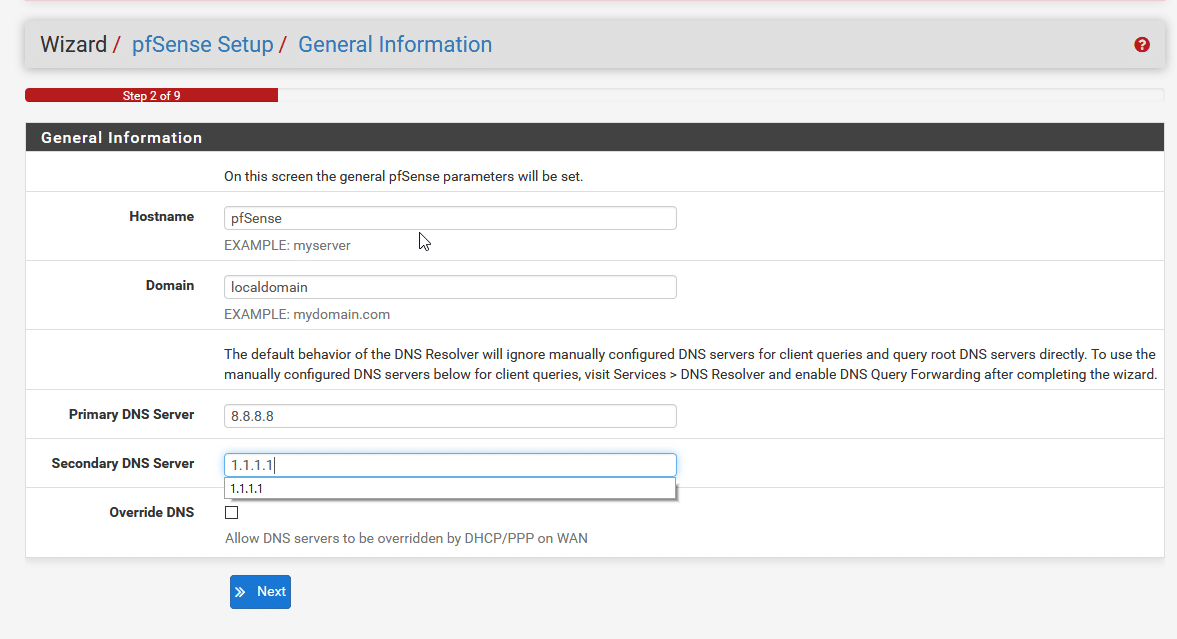
You should now be greeted with a login screen. Enter the default credentials (Username: admin Password: pfsense). You will now arrive at the setup wizard. After clicking next through the licensing page you will be prompted to set a hostname, domain name and DNS servers. Feel free to leave the hostname and domain name as default or change them if you would prefer something different. You can also pick any DNS servers you like. I have chosen 8.8.8.8 (Google DNS) as primary and 1.1.1.1 (Cloudflare DNS) as the backup. If you are running local DNS on your network and want pfSense to be able to resolve local hostnames then enter the IP address of your internal DNS server instead.
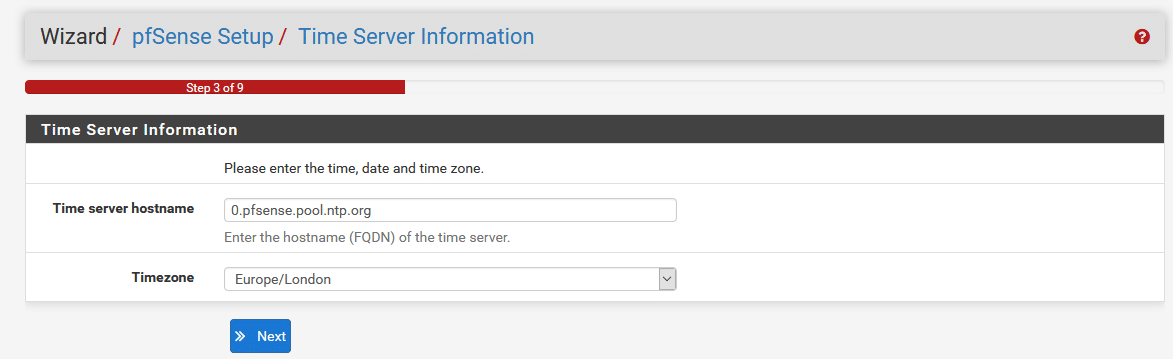
You will then be prompted to set an NTP server and timezone. Leave the NTP server as default and select the correct timezone for your location.
Next you will need to configure your WAN interface. The settings for this will depend on your ISP and at this point it is probably worth checking the configuration of your current router and copying the settings exactly. If you are setting this up behind another router, either to segment a particular subnet or just for testing then DHCP or Static will be the correct option depending on whether the WAN IP address changing would cause problems for what you’re trying to do.
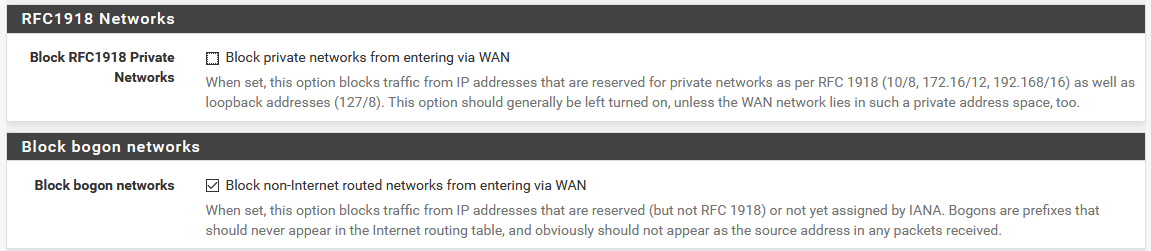
One pair of options to note right at the bottom of the page are “Block RFC1918 Private Networks” and “Block Bogon Networks”. RFC1918 private networks are networks which are not allocated to devices on the internet and should only be used behind NAT. These are 10.0.0.0/8, 172.16.0.0/12 and 192.168.0.0/16. For the most part these should be blocked but if your WAN interface has an IP address in these ranges (e.g. if it is behind another firewall that is doing NAT) you will need to allow this traffic. Bogon networks are other networks which should never be seen passing between networks. These include localhost IP addresses, link-local addresses and ranges which have not yet been assigned. It is almost always safe and desirable to block these.
Next we configure our LAN IP address. If you are happy with the 192.168.1.0/24 range then leave this as it is, if you would prefer a different range then set it here. Note, once you apply the setting you will need to access the web console on the new IP address you have set.

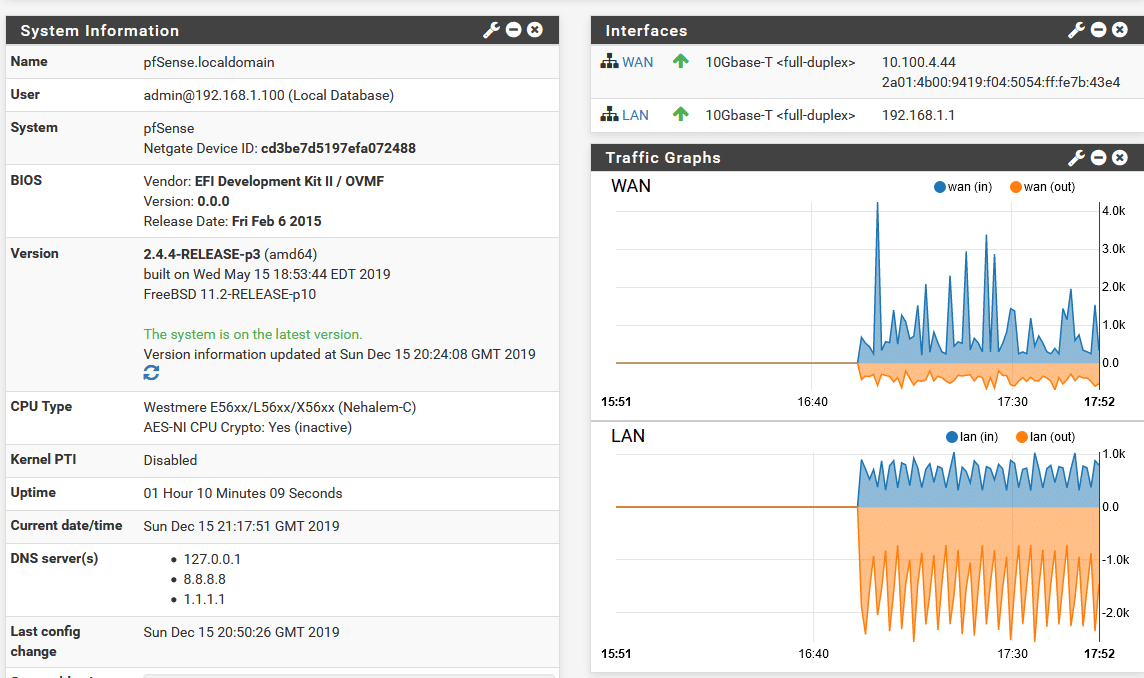
Finally, set a secure admin password and reload the firewall config to apply everything we have just set up. Once the config is reloaded we are taken to the main dashboard where we can see information about the system and, if everything has worked correctly, you should now have a functioning internet connection through your pfSense.
Housekeeping and final steps
While this guide aims to get you to the point of having a functioning internet connection through pfSense with advanced topics saved for future guides, there are a couple of additional steps which are worth taking to fix odd issues and perform basic optimisations. All of these are optional but depending on your setup, may be worthwhile.
Change the default management port
By default the pfSense admin interface listens on all interfaces (including WAN) on port 443/tcp. Don’t worry, this doesn’t mean that people can access your pfSense from the internet, there are firewall rules in place to stop that. However, it does mean you may run in to problems if you want to forward port 443 to another device on your network (e.g. if you plan to run a web server behind it). We can change the port to something else by going to System > Advanced > Admin Access and setting a custom value for “TCP Port”. Once set, you will need to specify this port number when accessing the admin interface so, for example, if you set it to 8443 you would need to access your web console by going to https://192.168.1.1:8443
Prefer IPv4
At present there is a bug in pfSense where the package manager will hang if it tries to connect over IPv6. If you have IPv6 enabled on your network, you should go to System > Advanced > Networking and select the option to prefer IPv4 over IPv6. Note that this setting only affects pfSense so any devices on your LAN will still be able to connect over IPv6 and will select a default IP version based on their own internal settings.
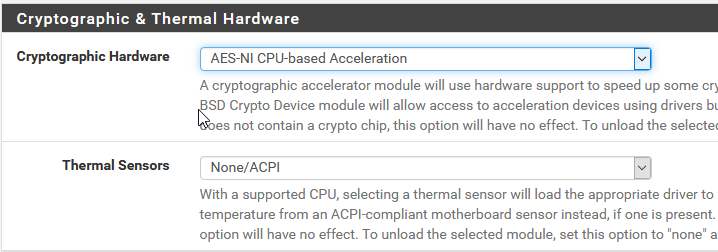
Enable hardware crypto acceleration
As mentioned previously, pfSense will perform cryptographic operations much faster with AES-NI. We can see the current AES-NI status from the dashboard under “CPU Type”

Here we can see pfSense has detected that the CPU supports AES-NI but it is set to inactive. It can be enabled in System > Advanced > Miscellaneous by setting “Cryptographic Hardware” to “AES-NI CPU-based Acceleration”