Whether due to a drive failure, a typo in a script or an overenthusiastic finger on the save key after an incorrect edit to a file, we’ve all at some point wished we’d taken backups more seriously. The problem, however, is that it can be time consuming to plan what needs to be backed up and, particularly in the case of automated backup systems costs can also be prohibitive whether due to licensing costs of enterprise backup tools or simply the cost of cloud storage. Many of us may simply make periodic copies of our important files on to an external hard drive. With several terabyte hard drives costing less than £100 this may appear to be a cost effective solution but requires discipline to take backups regularly and a great deal of care to manage multiple versions of important files. Furthermore, if the entire data set is copied every time the backups will be slow and consume vast quantities of space.
It is clear then that the best backup system is an automated one, ideally one with low running costs and few moving parts, reducing the risk of failure. By using a few simple, free tools it is possible to build an efficient backup script for UNIX and UNIX-like systems on a home server or even just another PC in your home. By using a snapshot-capable file system it is also possible to keep the amount of data required for backups to a minimum.
My approach is to use a file synchronisation tool such as rsync to handle the offloading of data and a snapshot-capable filesystem such as ZFS or BTRFS to manage retention of historical versions of data.
Rsync is an excellent UNIX tool for copying data to and from remote systems. By using the SSH protocol it can log in to remote systems to either place or retrieve data. It can also compare local and remote directories and only copy over files that have changed. This means that while the first time you copy a 1TB music or photo library it could take several hours, if ony a few changes are subsequently made, the next time you run the job it could complete in as little as a few minutes or even seconds. By using the –delete flag it is also possible to delete files in the destination folder which are not present in the source folder, meaning that files which were intentionally deleted will eventually be removed from the backups, meaning it won’t keep taking up space forever.
Rsync by itself is not a backup solution as it will only mirror a folder, meaning that if you accidentally delete a file or get hit by a ransomware attack and don’t notice until after the backup has taken place the backup will be no more useful than the live copy. For this we will need to use filesystem snapshots, a feature of modern filesystems such as BTRFS and ZFS which preserves a point-in-time copy of a filesystem. Both filesystems provide tools for creation and automatic cleanup of snapshots, allowing a set number of previous versions of your files to be retained.
One further aspect of the backup script I will describe is the ability to monitor whether the job has succeeded or failed. This is important as a set it and forget it solution could break without you checking it for months and only finding out when it’s too late. I have chosen to monitor my script via Zabbix as I already have a Zabbix server and it allows me to monitor other aspects of my backup server such as drive health and system load in a single place and provide email alerts in the event of a serious failure. This can easily be adapted to report to other monitoring systems such as Nagios or just to send an email if an error occurs.
Now that I’ve described each part it’s time to put it all together. For this tutorial I will use the example of backing up your desktop’s home direcory to a dedicated backup server. The instructions can be easily modified to fit your use case
Obtain the hardware
You will need one dedicated PC or one VM, it’s up to you which way you go but if you plan to use a VM it is still best to use a dedicated hard drive for the backup volume as storing backups on the same disk as your live data won’t protect you from disk failure. You will also need your backup disk or, if you’d prefer to add additional redundancy using a RAID volume, several disks. You will need at least as much storage as the data you plan to back up and should aim for 50 to 100% headroom to account for future growth.
Install an operating system
The example I provide here assumes that you are using a CentOS VM. If you’d prefer to use Ubuntu the instructions will be broadly the same and if you’d feel safer storing your data on ZFS than BTRFS you could also use one of the BSDs for your backup server. For the most part the only difference in the instructions if you choose a different operating system will be the commands to install software.
Install our tools
Install rsync from the repo:
# yum install -y rsync
There are various options for BTRFS snapshot management tools but personally I prefer btrfs-snp which can be obtained by running the following commands:
# wget https://raw.githubusercontent.com/nachoparker/btrfs-snp/master/btrfs-snp -O /usr/local/sbin/btrfs-snp
# chmod +x /usr/local/sbin/btrfs-snp
Configure SSH key exchange
You will need to make sure SSH is enabled on the desktop PC. For most Linux systems this is done by running ‘sudo systemctl start sshd’ and ‘sudo systemctl enable sshd’ but will vary on other UNIXs
On the backup server:
# ssh-keygen
This will create a key which can be used to log in to other systems. Accept the default options here and don’t set a passphrase as you won’t be able to enter it when we create our automated script
We will now need to copy the key to our desktop PC by running:
# ssh-copy-id [ip.of.desktop.pc]
This will ask you to confirm you trust the desktop so type ‘yes’ and hit return. You will then be prompted to enter the password for the root user of the desktop. Once this is entered the command will copy your public key to the desktop, allowing you to log in without a password in future. You can test this by running ‘ssh [ip.of.desktop.pc]’. You should be logged in to the desktop without having to enter a password. Once you have confirmed everything is working you can exit by typing ‘exit’ or pressing Ctrl+D
Set up your backup directory
We will now need to create our BTRFS filesystem, mount it and create subvolumes to store our backups
Use ‘lsblk’ to determine the ID of your backup disk. In this case I will assume it is /dev/sdb but CHECK THIS to avoid formatting the wrong disk. We create the filesystem with the following command
# mkfs.btrfs /dev/sdb
We will now create a mountpoint. In this case I will mount it at /backup so we will need to run
# mkdir /backup
We can then set up our drive to mount automatically at boot by adding the following line to /etc/fstab
/dev/sdb /backup btrfs defaults 0 0We can then run:
# mount -a
Run lsblk again to confirm that the row for sdb shows a mountpoint
NAME MAJ:MIN RM SIZE RO TYPE MOUNTPOINT
sda 8:0 0 7.3T 0 disk /backup
We then create a separate subvolume in the backup directory for each host we plan to back up. This is useful as snapshots are created per subvolume so we can run our scripts on different schedules for each host or folder by separating them in this way
# btrfs subvolume create /backup/desktop
# btrfs subvolume create /backup/desktop/home
Create our backup script
Place the following script in /etc/cron.daily to run it every day. It can be placed in /etc/cron.weekly to run once a week or called from /etc/crontab if more fine control over the timing is required
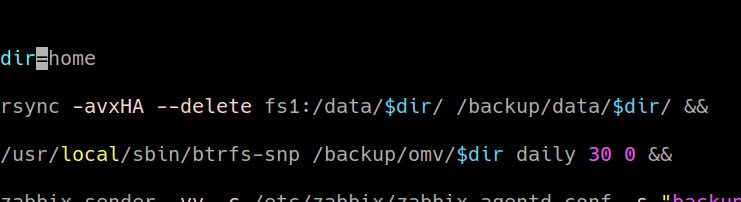
#! /bin/bash
#Synchronise our home folder to the backup server
 rsync -avxHA --delete [ip.of.desktop]:/home/ /backup/desktop/home/ &&
#Create a snapshot of the directory we just synchronised
 /usr/local/sbin/btrfs-snp /backup/desktop/home daily 30 0 &&
#Action to take if previous commands were successful (this is optional but may be useful for clearing alerts in monitoring systems)
zabbix_sender -c /etc/zabbix/zabbix_agentd.conf -s "backup.example.com" -k backup.desktophome -o 1 ||
#Action to take if any of the above commands fail
zabbix_sender -c /etc/zabbix/zabbix_agentd.conf -s "backup.example.com" -k backup.desktophome -o 0
I won’t cover the zabbix_sender commands in this tutorial but have left them in as examples of the ways the script can be monitored and generate an alert in the case of failure.
Our first command will recursively copy /home from desktop to our backup location and preserve all permissions and attributes. The -v flag is useful when manually running the script for testing purposes as it shows what files are being copied but can be omitted without affecting the command.
Our second command will then create a snapshot of the directory we have copied which will appear in /backup/desktop/home/.snapshots and will be called daily_[timestamp] and we keep a maximum of 30 snapshots. The script will remove the oldest snapshot when it runs once we reach 30 days of snapshots

Make the script executable by running:
# chmod +x /etc/cron.daily/name.of.script
Finally, run the script to create your initial backup and confirm everything is working as expected.
UPDATE: I have now written a guide on using zabbix_sender to collect data about when the script has been run. If you’re interested in that aspect of the script click here for that article.