Traditionally when we assign DNS servers to hosts we assign more than one. For example, we may assign 8.8.8.8 as a primary an 8.8.4.4 as a secondary so in the unlikely event that one is ever down, we have a second one to fall back on. When we set up a single Pi-hole server with no failover we lose this redundancy, meaning that if our Pi-hole ever goes down or we want to restart it for updates, we lose DNS until it is back.
The simplest way to regain this redundancy is just to run 2 independent Pi-hole servers and set them as the primary and fallback DNS servers. However, this approach has a couple of disadvantages. The main problem is that we have no setting synchronisation between our servers. If we update the block lists on one, we have to remember to update them on the other. We also can’t guarantee which server clients will connect to, so if one is down, clients may still try to connect and then have to wait for a timeout before querying the second server. This can cause performance drops when one of the servers is offline.
Using failover to provide a highly available Pi-hole cluster
We can resolve these problems by linking our pair of Pi-hole servers into a unified failover cluster. The original idea for this came from u/Panja0 on Reddit. However, this approach doesn’t quite work on Pi-hole 5 and above as the way the data is saved changed. This article is therefore an updated version of that basic idea to remain compatible with the latest Pi-hole versions.
To accomplish our goal we need to solve 2 problems. Firstly, we need a way to keep the blocklists and settings in sync between the 2 Pi-hole servers. We then need a mechanism to monitor the servers and hand over the IP address if the primary fails. If you are unconcerned about DNS timeouts, you can skip the IP failover setup and just have 2 servers on their own IP addresses. For the greatest reliability, you will want to configure both stages.
What do we need?
You will need 2 Pi-hole servers, ideally updated to the latest version but anything greater than 5.0 should work. You can update an existing instance to the latest version by running sudo pihole updatePihole. Note that this will restart the DNS resolver. I will not cover how to set up a Pi-hole server as I have described it previously. This article is a few years old so you will probably want to use a more recent OS such as Ubuntu 20.04LTS but the installation process is more or less unchanged. For a more recent guide, you can look at this article or the Pi-hole documentation. I will assume the use of a Debian/Ubuntu based distro for this guide but it should be easily adaptable for CentOS.
You will also need a third IP address which will be shared between the 2 servers.
Synchronising Pi-hole blocklists
Pi-hole 5 no-longer stores the blocklists in plain text files. Instead they are stored in a SQLite database in /etc/pihole/gravity.db. This means we can’t use Panja0’s original method of using rsync to synchronise the list files. Instead, we use Michael Stanclift’s (vmstan on GitHub) gravity-sync script.
This script will synchronise blocklists, exclusions and local DNS records. It won’t synchronise admin passwords, upstream DNS servers, DHCP leases and statistics. We will therefore need to manually configure the admin password and upstream DNS servers to be the same on both servers. There isn’t a practical way to have DHCP on the Pi-hole so that will have to run on the router or some other device.
Preparing the Pi-hole servers
To begin with, ensure all dependencies are installed. Most will already be installed but if not, we can catch them by running:
apt update && apt install sqlite3 sudo git rsync sshOn both servers, we will need a service account with sudo privileges. Create this account by running the following command on each server:
sudo useradd -G sudo -m pi
sudo passwd pi
On some distros (e.g. CentOS), the privileged group is called wheel instead of sudo so you may need to adjust this command.
Install Gravity-Sync on the primary Pi-hole
Pick one of the servers to act as the primary and log in to it as the pi user account. Run the installer script:
export GS_INSTALL=primary && curl -sSL https://gravity.vmstan.com | bashInstall Gravity-Sync on the secondary Pi-hole
Log in to the other server as the pi account and run:
export GS_INSTALL=secondary && curl -sSL https://gravity.vmstan.com | bashWhile the installer on the primary just verifies pre-requisites, the secondary needs additional configuration as it performs the active role of replication. When prompted, provide the name of the service account on the primary, the IP address of the primary and configure password-less SSH login.
Verify connectivity and enable synchronisation
On the secondary Pi-hole, navigate in to the gravity-sync directory and run:
./gravity-sync.sh compareThis should give you output similar to the below. It will not actually perform a sync but will verify connectivity and detect if a sync is required.
![$ ./gravity-sync.sh compare
[∞] Initalizing Gravity Sync (3.4.5)
[✓] Loading gravity-sync.conf
[✓] Evaluating arguments: COMPARE
[i] Remote Pi-hole: pi@10.100.4.53
[✓] Connecting to 10.100.4.53of Pi-hole
[✓] Hashing the primary Domain Database
[✓] Comparing to the secondary Domain Database
[✓] Hashing the primary Local DNS Records
[✓] Comparing to the secondary Local DNS Records
[i] No replication is required at this time
[✓] Purging redundant backups on secondary Pi-hole instance
[i] 3 days of backups remain (11M)
[∞] Gravity Sync COMPARE aborted after 0 seconds](https://davidshomelab.com/wp-content/uploads/2021/08/image-7.png)
If the primary already has configuration but the secondary is a fresh install you will want to ensure that the first sync is a one-way sync from the primary to the secondary. If you don’t do this, the script may detect the configuration on the secondary as newer and overwrite the primary. To force a one way sync, run:
./gravity-sync.sh pullFinally, enable automatic synchronisation by running:
./gravity-sync.sh automateSet an update frequency from the available options. Setting a lower frequency will increase the risk of changes not syncing but will result in reduced server load so may be more appropriate on busy servers.
Synchronisation should now be working, if you do not want to configure IP failover the setup is now complete. If you have additional servers you want to keep in sync, use the steps for adding a secondary server.
Configure IP failover
Now our Pi-hole instances are in sync, we can configure IP failover to direct traffic towards the primary when it is available and switch over to the secondary if the primary ever fails. On both servers, install the required packages:
sudo apt install keepalived libipset13 -yNext, we need to download a script on both servers to monitor the status of the pihole-FTL service so we can fail over if it ever stops running:
sudo mkdir /etc/scripts
sudo sh -c "curl https://pastebin.com/raw/npw6tcuk | tr -d '\r' > /etc/scripts/chk_ftl"
sudo chmod +x /etc/scripts/chk_ftl
Now, we need to add our keepalived configuration. On the primary, run:
sudo curl https://pastebin.com/raw/nsBnkShi -o /etc/keepalived/keepalived.confand on the secondary:
sudo curl https://pastebin.com/raw/HbdsUc07 -o /etc/keepalived/keepalived.confWe now need to edit the configuration on both servers. On each server, set the following properties:
| Property | Description | Example Server 1 | Example Server 2 |
interface |
The LAN network interface name. Run ip list to view available interfaces if you are unsure. |
eth0 | eth0 |
unicast_src_ip |
The IP address of the server you are currently configuring. | 192.168.1.21 | 192.168.1.22 |
unicast_peer |
The IP address of the other server. | 192.168.1.22 | 192.168.1.21 |
virtual_ipaddress |
The virtual IP address shared between the 2 servers, provided in CIDR notation. This must be the same on both servers. | 192.168.1.20/24 | 192.168.1.20/24 |
auth_pass |
A shared password (max 8 characters). This must be the same on both servers | P@$$w05d | P@$$w05d |
We are now ready to start and enable keepalived. On both servers, run:
systemctl enable --now keepalived.service
systemctl status keepalived.service
You should see a status of active. If you don’t see this, you most likely have an error in your config and the status message should give you a hint as to where it is. Additionally, on the primary server, you should see that it has placed itself into the master role.
![● keepalived.service - Keepalive Daemon (LVS and VRRP)
Loaded: loaded (/lib/systemd/system/keepalived.service; enabled; vendor preset: enabled)
Active: active (running) since Mon 2021-08-30 09:37:45 UTC; 9s ago
Main PID: 82740 (keepalived)
Tasks: 2 (limit: 4617)
Memory: 2.1M
CGroup: /system.slice/keepalived.service
├─82740 /usr/sbin/keepalived --dont-fork
└─82752 /usr/sbin/keepalived --dont-fork
Aug 30 09:37:45 pihole1 Keepalived_vrrp[82752]: Registering Kernel netlink command channel
Aug 30 09:37:45 pihole1 Keepalived_vrrp[82752]: Opening file '/etc/keepalived/keepalived.conf'.
Aug 30 09:37:45 pihole1 Keepalived_vrrp[82752]: Registering gratuitous ARP shared channel
Aug 30 09:37:45 pihole1 Keepalived_vrrp[82752]: (PIHOLE) Entering BACKUP STATE (init)
Aug 30 09:37:45 pihole1 Keepalived_vrrp[82752]: VRRP_Script(chk_ftl) succeeded
Aug 30 09:37:46 pihole1 Keepalived_vrrp[82752]: (PIHOLE) received lower priority (145) advert from 10.100.4.54 - discarding
Aug 30 09:37:47 pihole1 Keepalived_vrrp[82752]: (PIHOLE) received lower priority (145) advert from 10.100.4.54 - discarding
Aug 30 09:37:48 pihole1 Keepalived_vrrp[82752]: (PIHOLE) received lower priority (145) advert from 10.100.4.54 - discarding
Aug 30 09:37:49 pihole1 Keepalived_vrrp[82752]: (PIHOLE) received lower priority (145) advert from 10.100.4.54 - discarding
Aug 30 09:37:49 pihole1 Keepalived_vrrp[82752]: (PIHOLE) Entering MASTER STATE](https://davidshomelab.com/wp-content/uploads/2021/08/image-2.png)
Testing Pi-hole failover
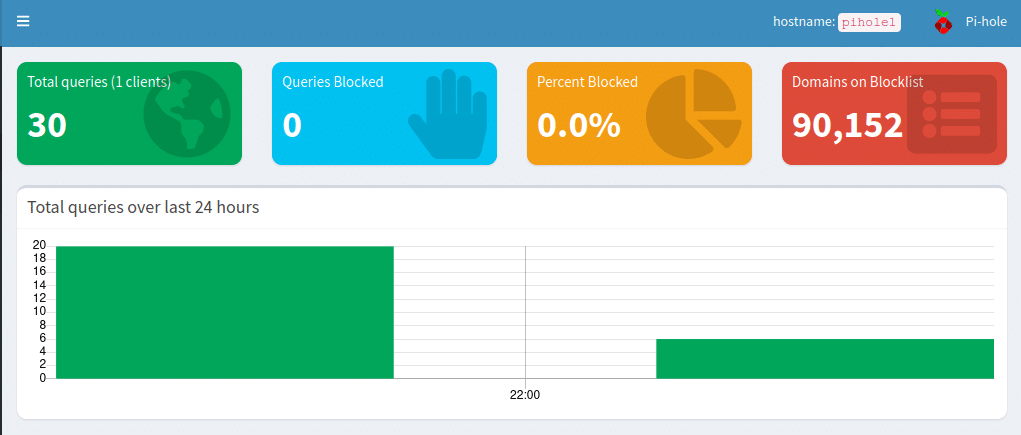
You should now be able to reach the Pi-hole interface on the virtual IP we configured previously (e.g. http://192.168.1.20/admin). In the top right corner of the interface it will show the hostname and you should see that it is the primary server. To check that failover is working, shut down the primary server. If you reload the page you should see that the hostname in the top right has changed to the name of the secondary.


You can also test DNS requests using nslookup. The following script will make a DNS lookup every second, allowing you to verify that you receive responses even if the primary is offline:
while true; do
nslookup davidshomelab.com [virtual IP of Pi-hole cluster]
sleep 1
done
If you shut down pihole1 while this script is running you should see that DNS lookups are not interrupted. There may be a brief moment of interruption at the exact moment that the failover occurs but it should resume within around a second.