Kodi has long been a favourite among media centre enthusiasts, its full screen interface gives a set-top-box like feel to your media PC and its remote control apps for iOS and Android make for a much better TV-watching experience than having to constantly reach for a keyboard and mouse. With version 18 Kodi also includes DRM support meaning it is possible to include add-ons for Netflix and other popular home streaming services, making it an excellent choice for both local and streaming media. One pitfall of having Kodi on its own dedicated PC is that certain maintenance tasks such as adding media to the library may require access to a full desktop environment, another is that we may later decide we want a separate Kodi installation in another room. We might want to start watching a show in the living room and then finish it of in bed or have something to watch in the kitchen while we’re cooking. Does this mean we now need to have multiple separate libraries, possibly taking up hundreds of gigabytes in space and update each of them when we load another show?
We can solve both of these problems by turning our Kodi box in to a fully fledged media server complete with a file share to upload our media and a database which can be shared with other Kodi instances to synchronise our media library and watch history with all our devices
Step 1: Preparing our device
To start with we’ll need our media server hardware. You can build your own custom set top box or simply use an old desktop or a laptop. When we add additional clients you can even use a Raspberry Pi for these although this will probably not be powerful enough for our server. We’ll want to make sure we have at least enough storage for our media library with room for future expansion so if you do plan on using an old PC it may be wise to invest in additional storage.
I will be setting my server up on Ubuntu 18.04 LTS but the process is broadly the same on other Linux distributions, Windows or macOS so if you’re more comfortable with those operating systems you may still be able to follow these instructions and achieve similar results.
Step 2: Install Ubuntu
I will be using the desktop version as we will need a display manager and X anyway to make Kodi work but these could also be installed on the server version if desired.
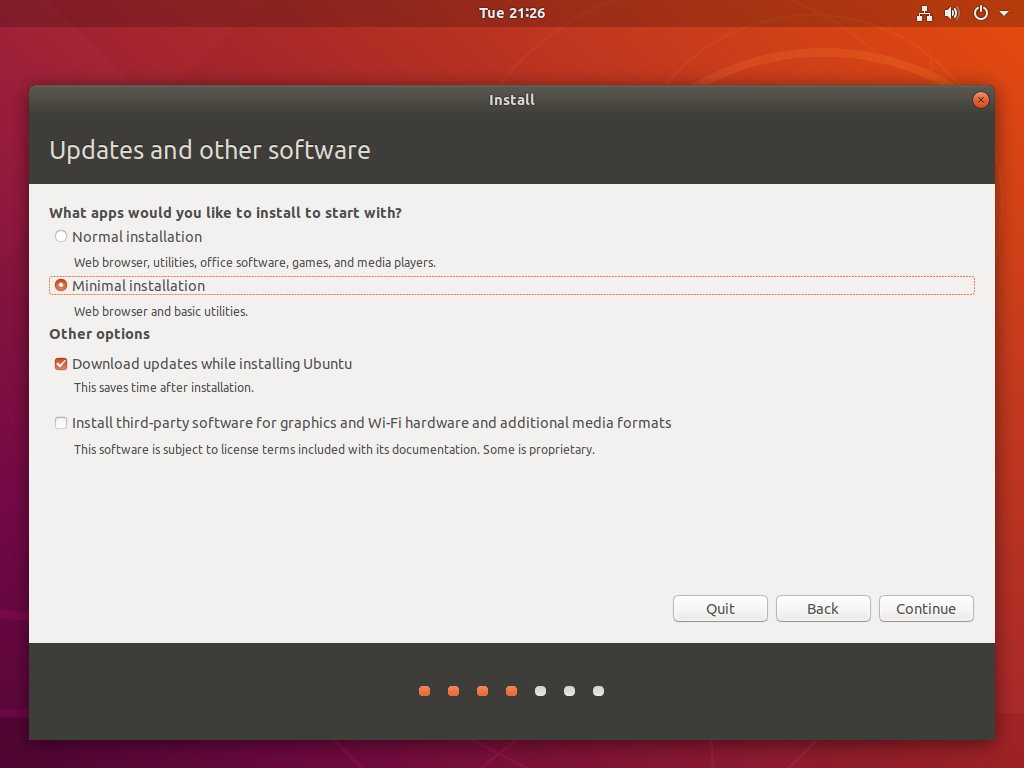
Click through the installer, selecting whichever settings you prefer regarding language and keyboard layout. When you get to the Updates and Other Software screen, select Minimal Install. We won’t be needing any of the additional apps that come with the full install.
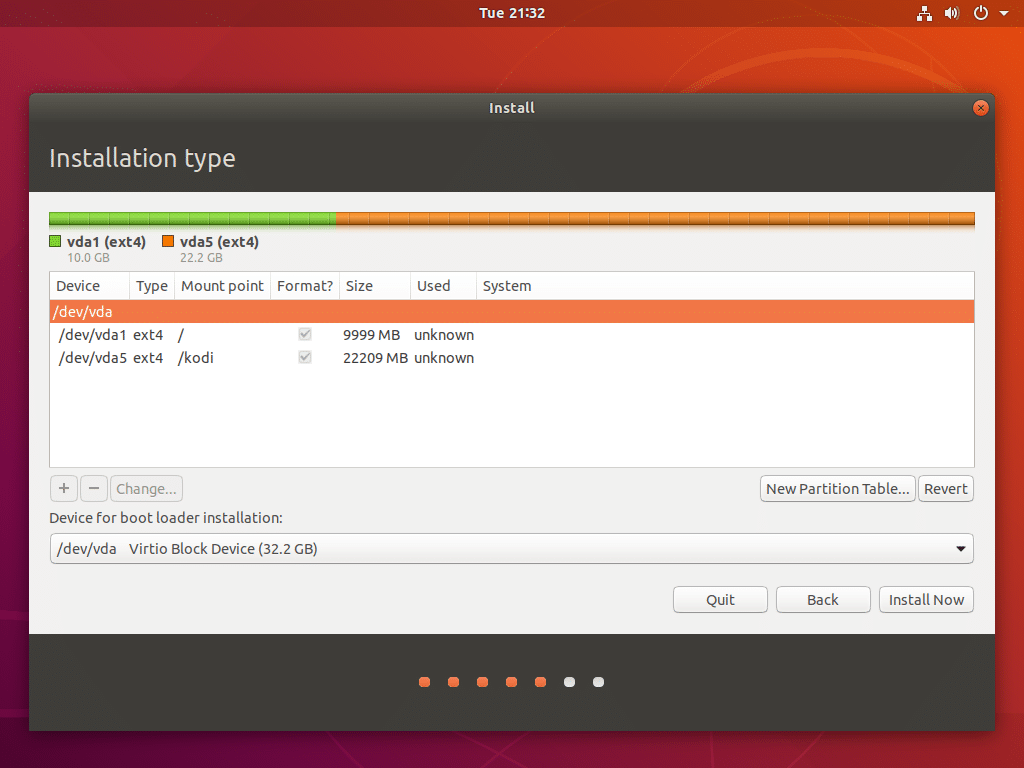
You will next come to the disk partitioning screen. I would advise placing your media library on a separate partition as this will make it easier to reinstall the system should you ever need to. Select the option “Something else” and click “Continue”. Now select “New Partition Table…” and accept the warning that it will erase anything on the disk. If this is a fresh disk this won’t affect anything but if you have important data on the disk you’ll need to shut down, copy the data to somewhere else and start again). You should need about 10GB for your root partition and the rest can go to your media library. I have set mine to mount to /kodi but you can choose another location if you’d prefer.
Select “Install Now” and wait for the installer to complete. While it’s installing you’ll be prompted to set up your account, you can pick any username and password you like.
Step 3: Configuring our services
Once we have our system installed, logged in and up to date we can begin to configure our file shares and MariaDB server. Open a terminal and type:
sudo apt install mariadb-common mariadb-client mariadb-server
sudo mysql_secure_installation
The second command will prompt you to remove test databases, tighten up security and set a secure root password. Make a note of this password as we will need it later when configuring Kodi to act as a database client.
We will now create a user that Kodi can use to access the database. Enter the following commands
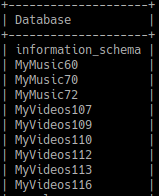
sudo mysql -u root -p
   [[enter the mariadb root password assigned in the first step]]
MariaDB [(none)]> CREATE USER 'kodi'@'%' IDENTIFIED BY 'supersecurepassword';
MariaDB [(none)]> GRANT ALL ON `MyVideos%`.* TO 'kodi'@'%';
MariaDB [(none)]> GRANT ALL ON `MyMusic%`.* TO 'kodi'@'%';
MariaDB [(none)]> flush privileges;
MariaDB [(none)]> \q
This will allow the user ‘kodi’ to connect to the database from any IP address using the password we have chosen. If you would only like the database to be accessible from a specific IP address or set of addresses you can modify the username accordingly. For example ‘kodi’@’192.168.0.%’ would allow access from any device on the 192.168.0.0/24 subnet but not from any other locations.
We also grant the kodi user the right to create and modify any databases whose names begin with MyVideos or MyMusic. This is required as Kodi creates new databases when it updates to a new version. If you are only using this database server for Kodi you could instead simply grant privileges on *.* as there is no risk of it accessing databases from other applications but if you plan to use the server for other things or you anticipate hosting other databases on it in the future then it is worth locking it down at this point.
Step 4: Setting up our file share
Kodi supports SMB and NFS file shares so either can be used. We will use SMB as it provides greater compatibility with Mac and Windows systems, meaning that media can be uploaded from your Windows PC to your media server.
We first need to take ownership of the media folder as by default it is owned by the root user. Open a terminal and type
sudo chown myusername: /kodi
We open up a file manager and navigate to the root of our filesystem (or wherever we mounted our media partition). Now right click on “Local Network Share” and click “Share this folder”
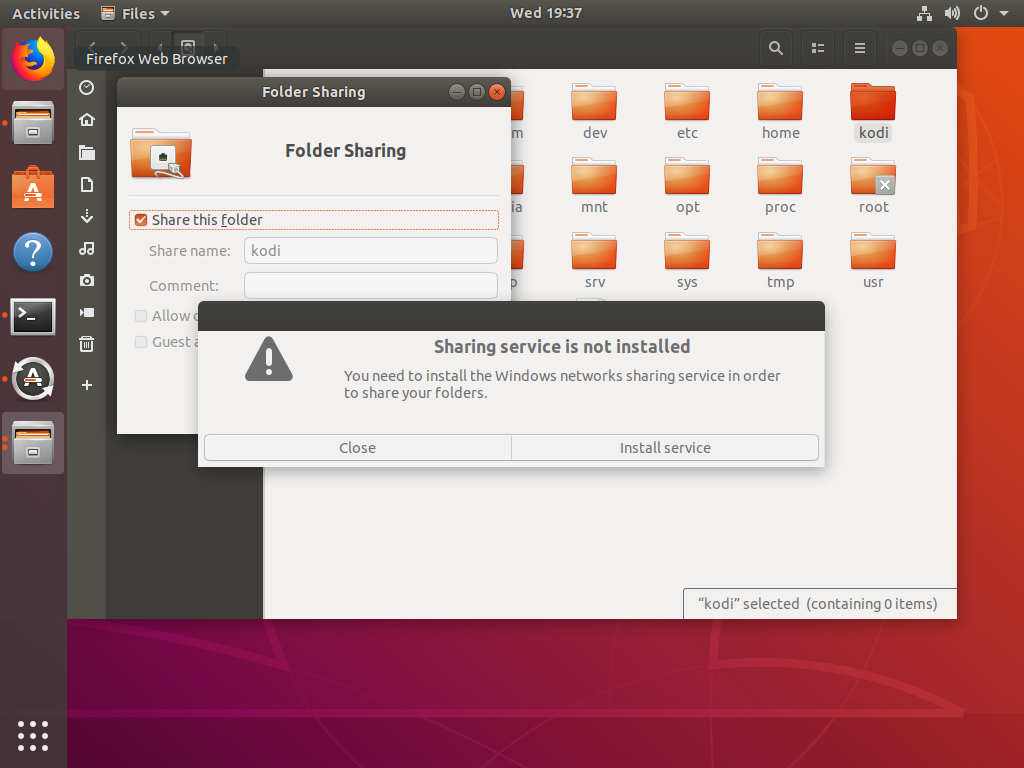
We now get a warning that Windows network sharing services are not installed and the option to install them. Click “Install service”. Once you enter your password the services will install and you can click “Create share”
Now our share is created we will need to set a password for our Samba user so we can access it. While Samba takes its list of users from the system user database it retains its own password database by default. We can set our password by running
sudo smbpasswd -a myusername
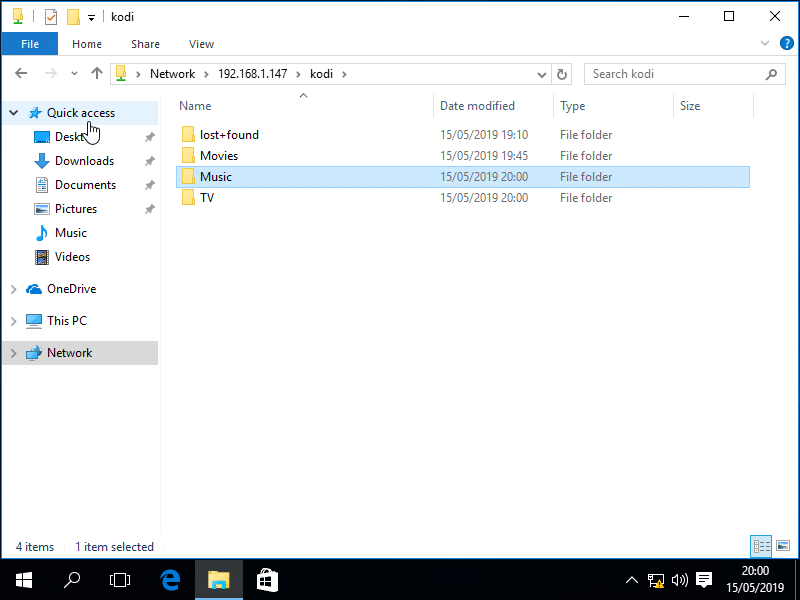
If we ever want to change this password we do so by running “smbpasswd” as our user, we only need to run as root to create the samba user. We can now test our share by navigating to it from another PC. In Windows we would go to “\\ip.of.our.server” and on Mac or Linux we would go to “smb://ip.of.our.server.”
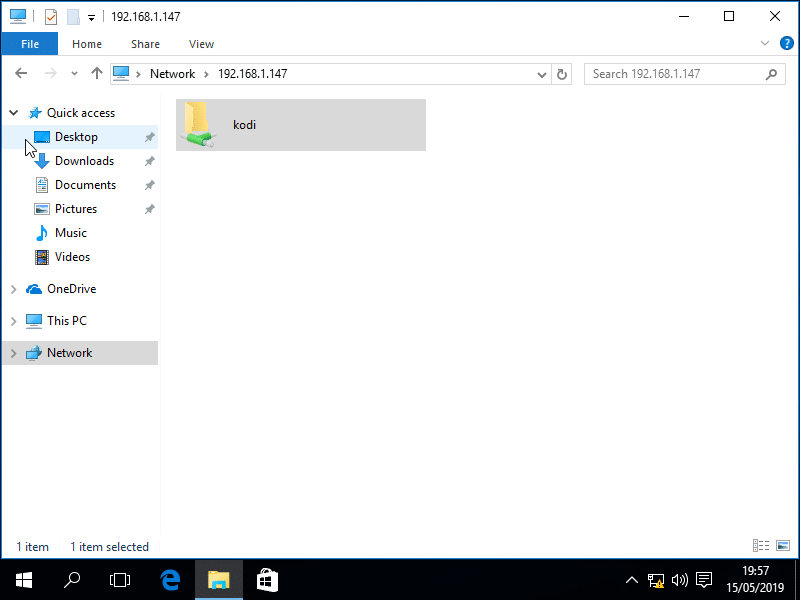
If we are successful we will see our Kodi share and will be able to log in to it using our linux username and the Samba password we have just set. Once we connect to our share we can create folders for movies, TV shows and music and adding media to our library.
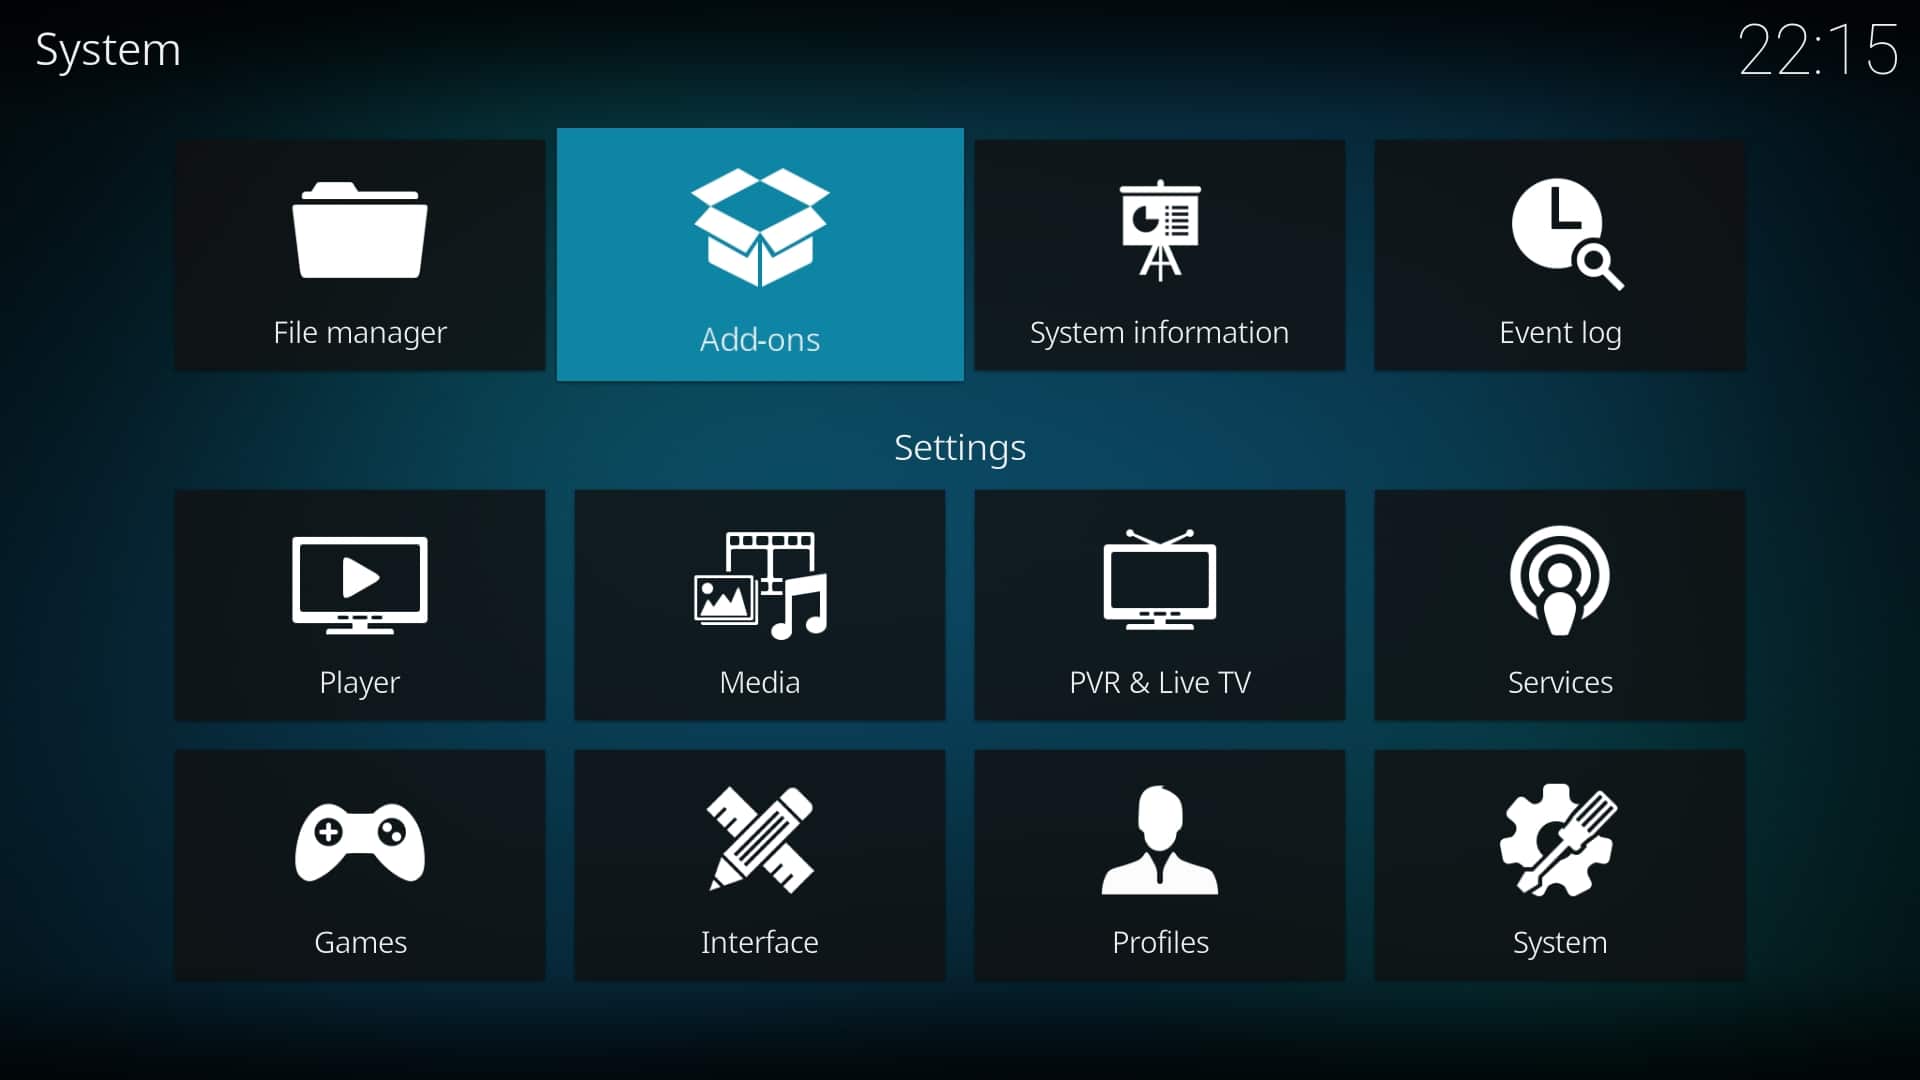
Step 5: Install and configure Kodi
From a terminal, install Kodi by running
sudo apt install kodi
We now need to configure Kodi to use our mySQL server as its database backend. We do this by creating a file called advancedsettings.xml and placing it in ~/.kodi/userdata. Just copy and paste the following text in to a file and set the IP address to the actual IP address of your server and the password to the database password we set for our Kodi user
<advancedsettings>
  <videodatabase>
    <type>mysql</type>
    <host>ip.of.our.server</host>
    <port>3306</port>
    <user>kodi</user>
    <pass>mysupersecurepassword</pass>
  </videodatabase>
  <musicdatabase>
    <type>mysql</type>
    <host>ip.of.our.server</host>
    <port>3306</port>
    <user>kodi</user>
    <pass>mysupersecurepassword</pass>
  </musicdatabase>
  <videolibrary>
    <importwatchedstate>true</importwatchedstate>
    <importresumepoint>true</importresumepoint>
  </videolibrary>
</advancedsettings>
When we now open Kodi we will need to add some media. Movies, Music and TV Shows, click the “Enter files section” button.
Once we enter the files section we will want to go in to the files folder. This will be empty at this point but it will give us the option to add videos. We will want to add both our Movies and TV Shows folders to the library and label them accordingly

We will now need to go to the folder labeled “Files” and select “Add videos…” This will take us to a screen where we can add video sources which will be indexed and added to our library.

We now browse for our file shares we set up previously. When we select Browse it will give us several options for the type of filesystem we wish to access. We have the option of local files on our server or network files accessed via NFS or SMB. Even though our media is on the same server as Kodi it is essential that we add it via the network share. The reason for this is that the file paths are added to the Kodi database so if we were to add local files they would not be accessible when we use the same database on other computers.

When we attempt to access our Kodi share we will be prompted for a password, enter the SMB credentials you set up previously and make sure to tell it to remember the password.

We now enter our Movies directory and click “OK”. Click “OK” again to add the video source. We are now asked what type of media this directory contains. In this case we will select “Movies”. This enables Kodi to look up the files on The Movie Database and tidy up the titles and download additional metadata and artwork.

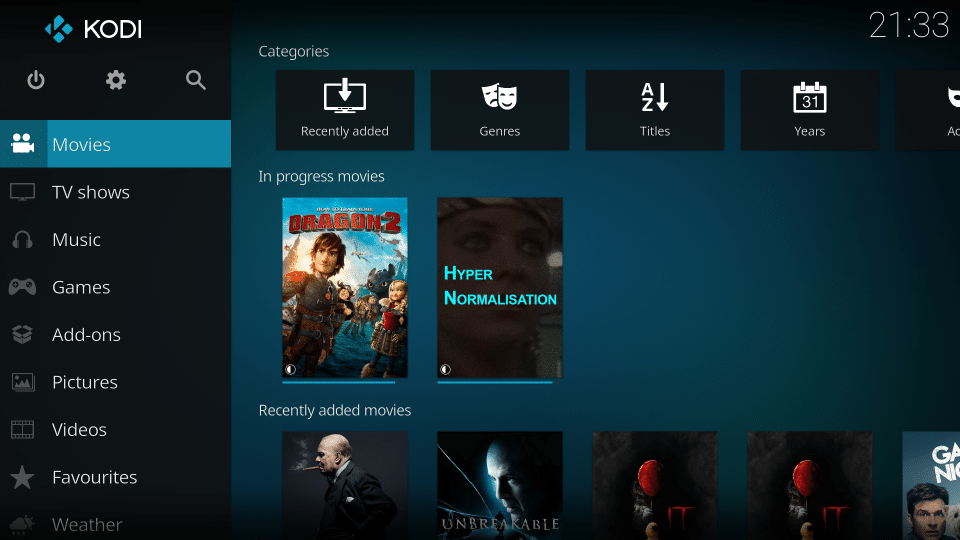
We now repeat these steps for TV and Music and we will start to find our home screen looks a lot more interesting. Our Kodi setup is now complete and our media server is perfectly ready for watching our movies on this device and for configuring other devices to share the same library.
Step 6: Configuring automatic login
While our media centre may now be perfectly usable it is a hassle to have to log in to the PC each time it starts up and then start Kodi. On a real set top box we would expect our media centre to start automatically on boot. We can configure this in Ubuntu without too much trouble.
As root, edit /etc/gdm3/gdm.conf and uncomment the following lines:
AutomaticLoginEnable=True
AutomaticLogin=myusername
Now log out of the system and prior to logging back in select “kodi” from the gear menu next to the login button.

Once we are logged in we will go straight in to Kodi and if we reboot we will find that we automatically get logged in to Kodi without having to enter a password. Now just sit back and enjoy some movies; you’ve earned it.
Step 7: Adding secondary Kodi installs
Ok, so we’re not quite done yet. I mentioned earlier that this setup would enable us to share the Kodi database on multiple devices. Fortunately this is very simple. Just install Kodi and place the advancedsettings.xml file in the userdata folder on your secondary system. When you start Kodi all of your media will come up immediately. The location of the userdata folder varies between devices but here is a list of the common ones:
| Windows | %APPDATA%\kodi\userdata |
| macOS | /Users/<your_user_name>/Library/Application Support/Kodi/userdata/ |
| Linux | ~/.kodi/userdata/ |
| Android | Android/data/org.xbmc.kodi/files/.kodi/userdata/ |
| LibreELEC | /storage/.kodi/userdata/ |
Final notes
You need to have an active network connection when Kodi starts up otherwise it will not connect to mySQL and your library will appear empty. On most devices this is not a problem but it probably will be on LibreELEC. There is a setting in LibreELEC options to wait for the network before starting Kodi. You will probably need to make sure this is set to avoid issues.
While all your devices will have access to your media sources, only your first device will have the sources added. This means that all library updates must be performed from your master Kodi instance for the library to replicate to the others.
While it is possible to synchronise local media, it is not possible to synchronise add-ins meaning they’ll need to be installed individually on each device.
You will also need to make sure all your devices are running the same version of Kodi to keep the databases in sync.